Tag: 라즈베리파이
3D Printed Humanoid Robot – Robonoid – LineUp – 20180621
[20190107] Upload Links
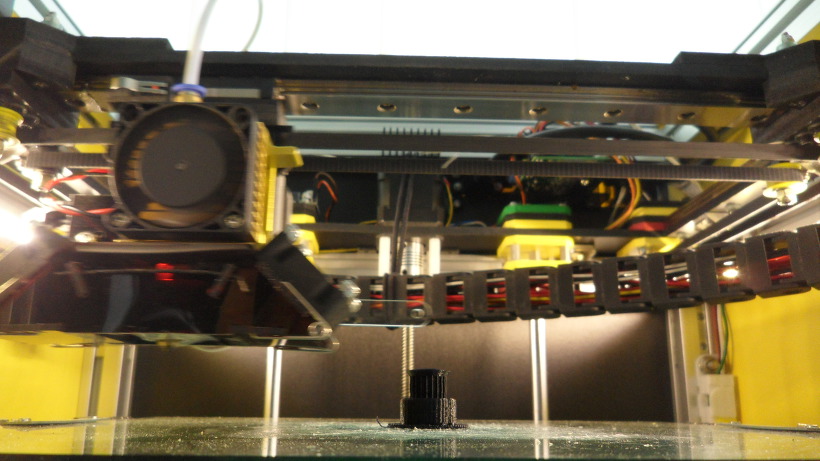
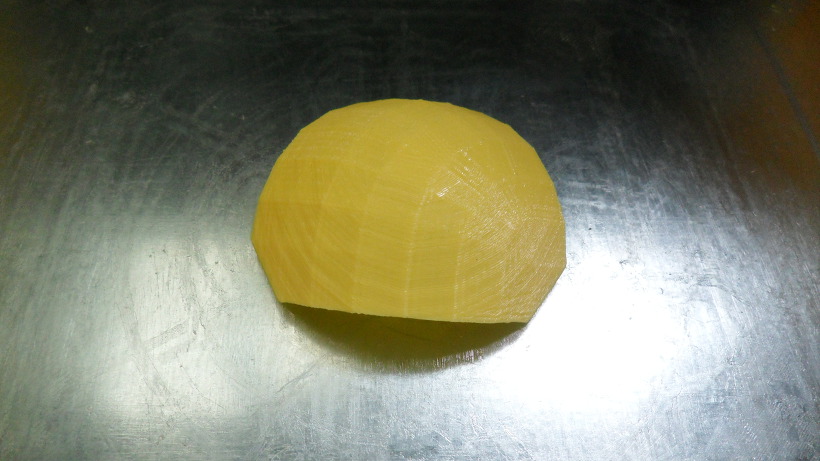
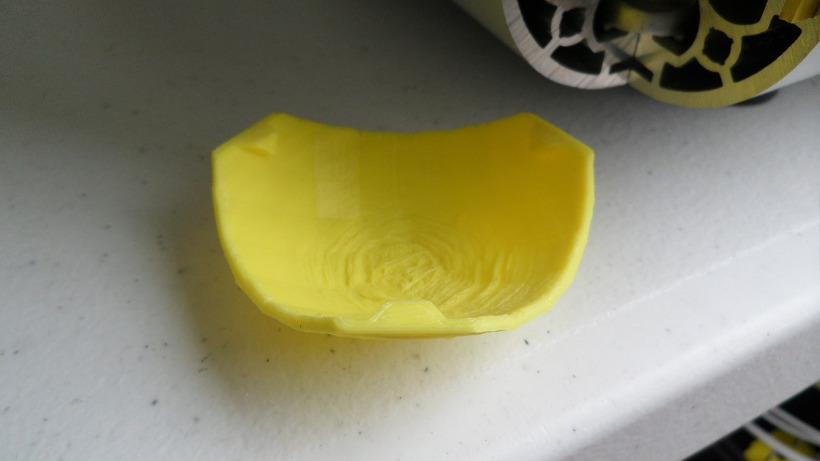
[20181101] Printing
[20180621] Update Design concept
[20180619] Update Design concept
[20180607] Update Design concept
[20180604] Update Design concept
[20180430] Design concept
Humanoid Robot – Robonoid – Design concept – https://youtu.be/n-flpiyNw-M
3D Design Tool: SketchUp Pro
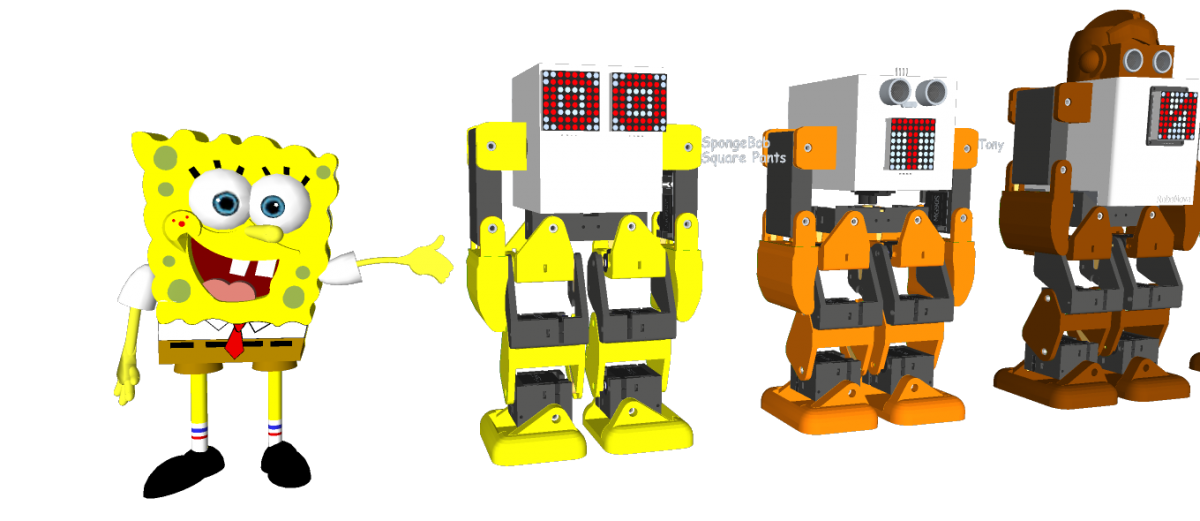
Robonoid is small sized bipedal walking robot The robot has 17 or 19, 24 freely moveable joints and servomotor in order to provide for a range of action and stable movements. Since it’s small in size, Robonoid can balance well and cope with basic movements such as walking and getting up. Also, intricate movements like roller skating and skateboarding are possible.
Robonoid is a wireless controllable robot You can control it by WiFi protocol through your PC and Smartphones. App for android and iOS are an especially intelligible UI. By using it, complicated operations can be controlled more easily.
Robonoid is a friendly robot Robonoid was named indicates a “simply shaped robot” that everyone imagines. Robonoid was designed by pursuing a simple appearance and simple functionality.
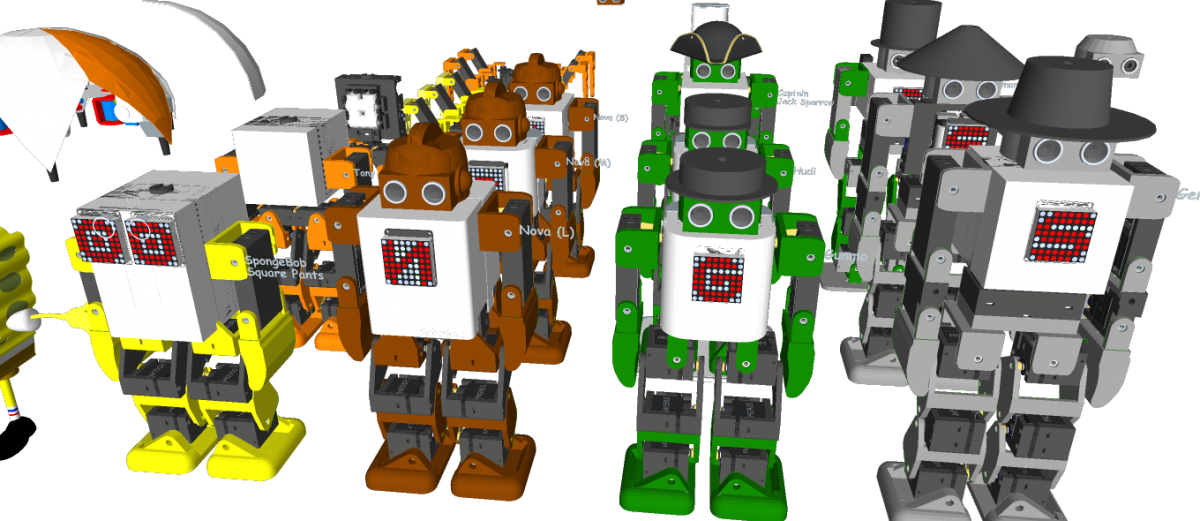
Robonoid Lineup
PSY – 135.7mm(W) x 258.39mm(H) x 100mm(D) – 17DOF
Jack – 135.7mm(W) x 305.62mm(H) x – 92,48mm(D) – 22DOF
Gentleman – 135.7mm(W) x 341.22mm(H) x – 78.5mm(D) – 22DOF
Tony – 135.7mm(W) x 265.5mm(H) x – 100mm(D) – 18DOF
SpongwBob – 135.7mm(W) x 230.0mm(H) x 100mm(D) – 16DOF
Hudi – 135.7mm(W) x 251.4mm(H) x 87mm(D) – 19DOF
Gunmo – 135.7mm(W) x 259.3mm(H) x 78.5mm(D) – 19DOF – https://youtu.be/qIZJZDcRpVw
Nova – 135.7mm(W) x 282.8mm(H) x 100mm(D) – 17DOF – https://youtu.be/kzfyKRzp_9I
Hexapod S1 – DOM 352.83mm(WD) x 193.16mm(H) – 20DOF
Robonoid is a Plen/mini-Plan/RoboHero robot derivative designed at Zalophus DesignHouse. We love the Plen2 robot but its want to new design. This is our take on a new lower cost version of the Plen2 robot using MG90S/ES08MA-II/SG90 servo’s.
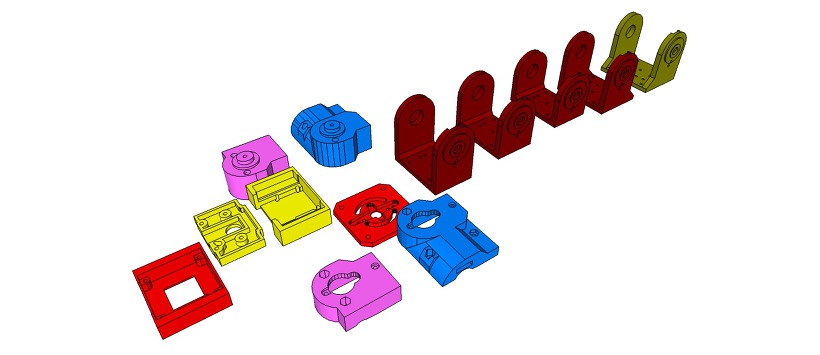
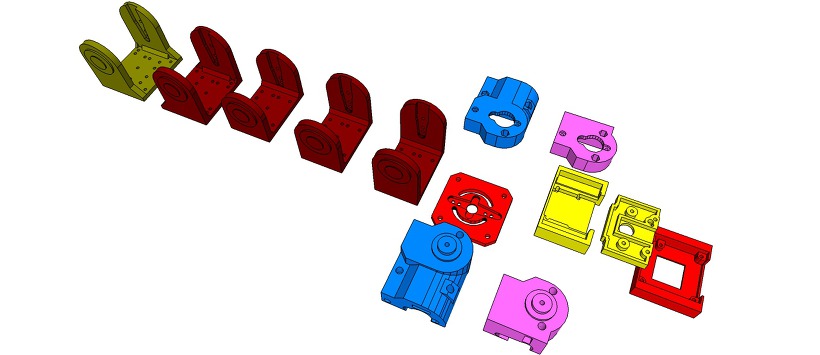
The 3D printing parts were inspired by the Plen2 components, but they were redrawn from SketchUp to use the inexpensive MG90S servo motors.
Electronic Parts
1 x WeMos D1 mini ESP8266 ESP-12
1 x PCA9685 16-channel, 12-bit PWM Fm+ I2C-bus Servo controller
1 x Shield Robonoid-20CH-R0a
1 x HC-SR04 Ultrasonic Distance Measurement Sensor
2 x 16340 or 18650 Battery Holder
1 x 2S 7.4V Lithium Battery Charger Protection Board
2 x 16340 or 18650 Batteries
2 x Snap-In Single ‘A’-‘AA’ Battery Contacts 209 [KEYSTONE ELECTRONICS CORP.]
2 x Snap-In Single ‘A’-‘AA’ Battery Contacts 228 [KEYSTONE ELECTRONICS CORP.]
1 x DC Jack and Battery Harness Cable
17/19 x MG90S Metal Gear Servo Motors
3D Printing Parts
- Robonoid_BatteryBracket16340.stl ……https://pinshape.com/items/49080
- Robonoid_BatteryHolder18650.stl …..https://pinshape.com/items/49082
- Robonoid_BodyGentleman.stl ……..https://pinshape.com/items/49105
- Robonoid_BodyGunmo.stl …….https://pinshape.com/items/49100
- Robonoid_BodyHudi.stl ……https://pinshape.com/items/49098
- Robonoid_BodyNovaL.stl …….https://pinshape.com/items/49101
- Robonoid_BodySpongeBob.stl ……………”
- Robonoid_BodyNovaS.stl …..https://pinshape.com/items/49103
- Robonoid_BodyTony.stl …….https://pinshape.com/items/49102
- Robonoid_BodyTonyPants.stl ……”
- Robonoid_BodyTonyServoBracket.stl ……”
Robonoid_CapBaseball.stl ……https://pinshape.com/items/49095 - Robonoid_CapHudi.stl ………………..”
Robonoid_eYeLED5.stl ……….https://pinshape.com/items/49106
Robonoid_eYeWS2812.stl …….https://pinshape.com/items/49107
Robonoid_HatBoaterGunmo.stl ……https://pinshape.com/items/49093 - Robonoid_HatConical.stl ……………….”
- Robonoid_HatFes.stl ……………………..”
- Robonoid_HatTC.stl ……………………..”
- Robonoid_HatTop.stl …………………….”
Robonoid_Head.stl ……https://pinshape.com/items/49091
Robonoid_HeadNova.stl …….https://pinshape.com/items/49000
Robonoid_ElbowShoulderRol_Leftl.stl …….https://pinshape.com/items/49071
Robonoid_Foot_Left.stl …….https://pinshape.com/items/49057
Robonoid_FootSlim_Left.stl …….https://pinshape.com/items/49057
Robonoid_FootSimple_Left.stl ……..https://pinshape.com/items/49057
Robonoid_FootRollPitch_Left.stl …….https://pinshape.com/items/49063
Robonoid_Hand_Left.stl ……..https://pinshape.com/items/49070
Robonoid_HandWristShoulderPitchThighYawFoot_Left.stl ….https://pinshape.com/items/49072
Robonoid_Knee_Left.stl ……https://pinshape.com/items/49064
Robonoid_KneePitch_Left.stl ……..https://pinshape.com/items/49067
Robonoid_ShoulderPitch_Left.stl ……..https://pinshape.com/items/49072
Robonoid_ThighPitchHipRollNova_Left.stl ……..https://pinshape.com/items/49068
Robonoid_ThighPitchRoll_Left.stl ……https://pinshape.com/items/49063
Robonoid_Pants.stl …….https://pinshape.com/items/49105
Robonoid_PantsBottom.stl ……………”
WANT TO SUPPORT Zalophus’s DesignHouse?
The open source Humanoid Robot – Robonoid hardware and software is free and made with love. Please show your level of support with a voluntary donation.
Donate: https://www.paypal.com/cgi-bin/webscr?cmd=_s-xclick&hosted_button_id=RDN7ZGAVFS5UE
3D Printed Hexapod Robot – Robonoid – H1 – Design concept – Update – 20180621

___
Hexapod Robot – Robonoid – H1 -Design concept
___
Update design concept 20180621]
– Parts Update: pinshape: https://pinshape.com/items/26844
Update design concept 20170418]
– Parts Upload: pinshape: https://pinshape.com/items/26844
[ Upload design concept 20161001]
___
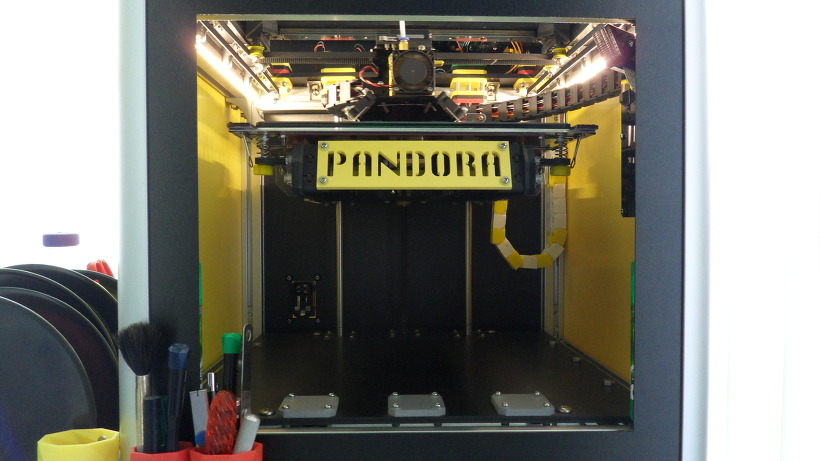
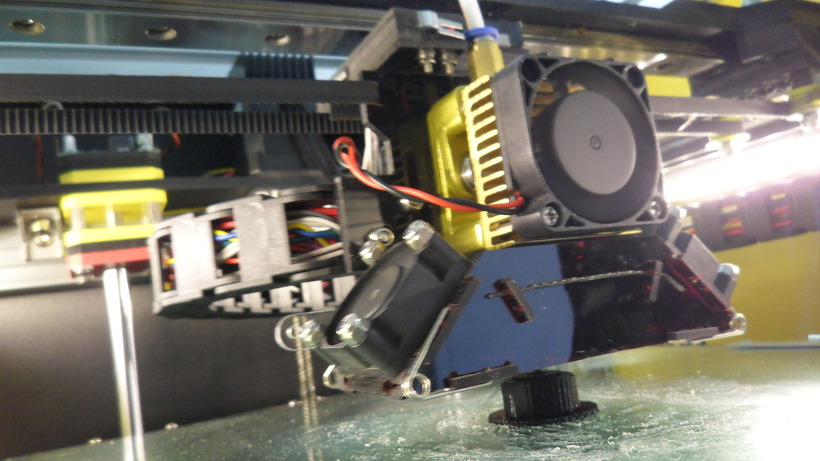
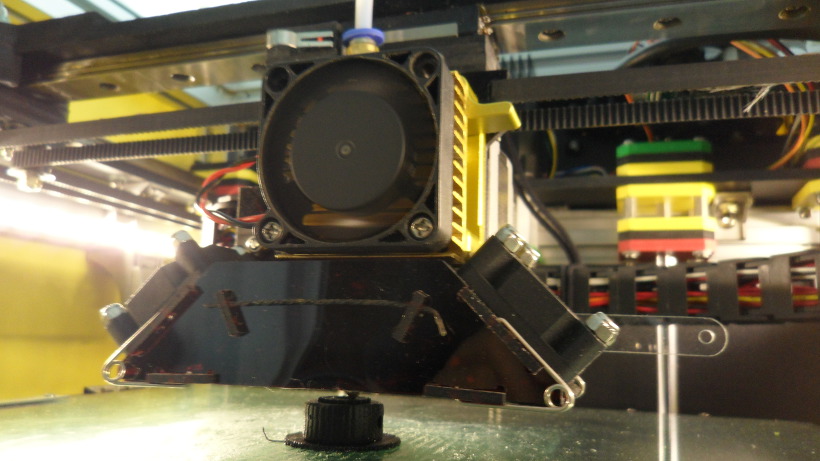
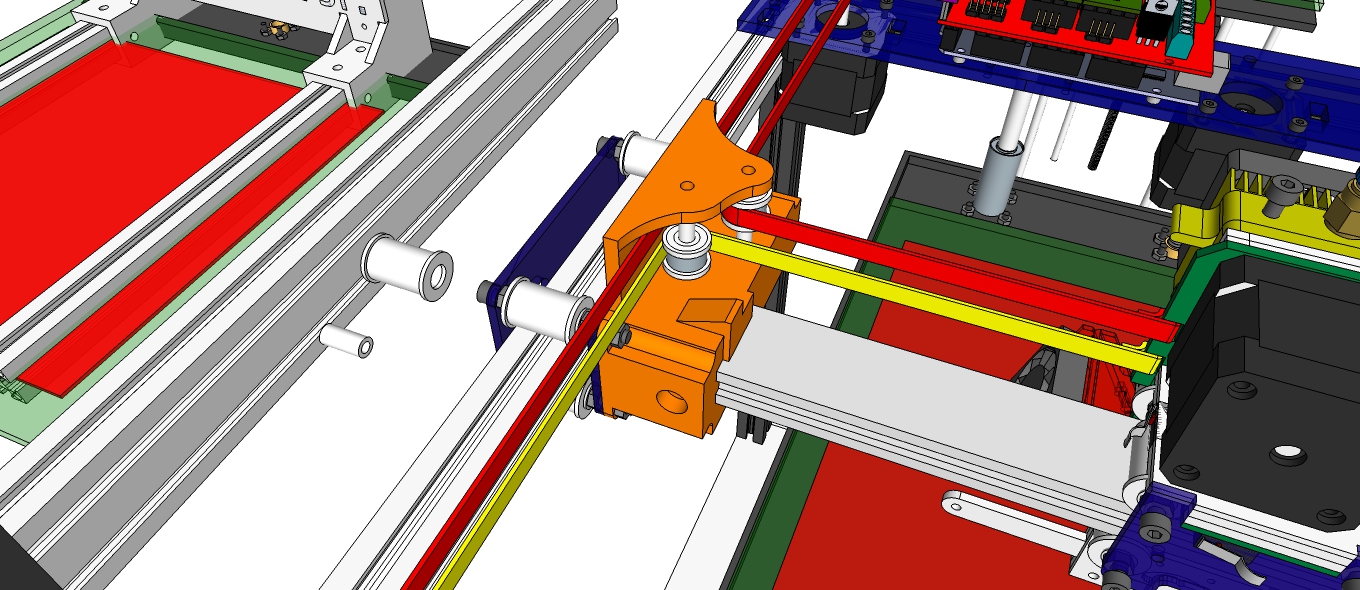
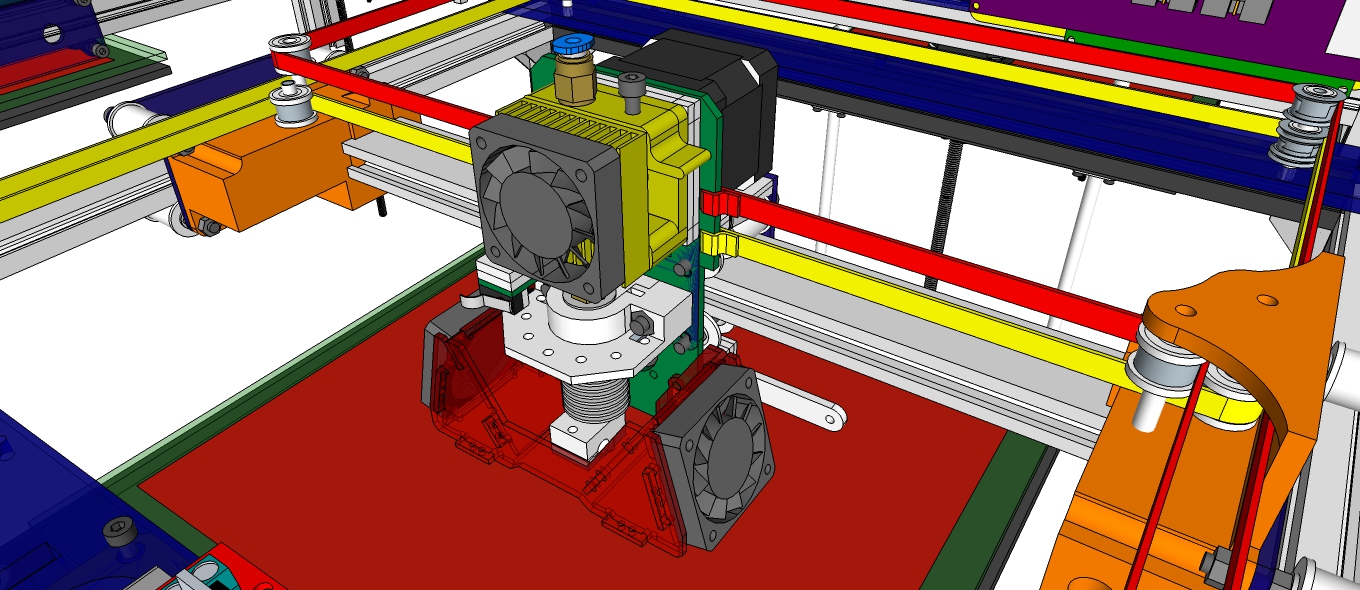
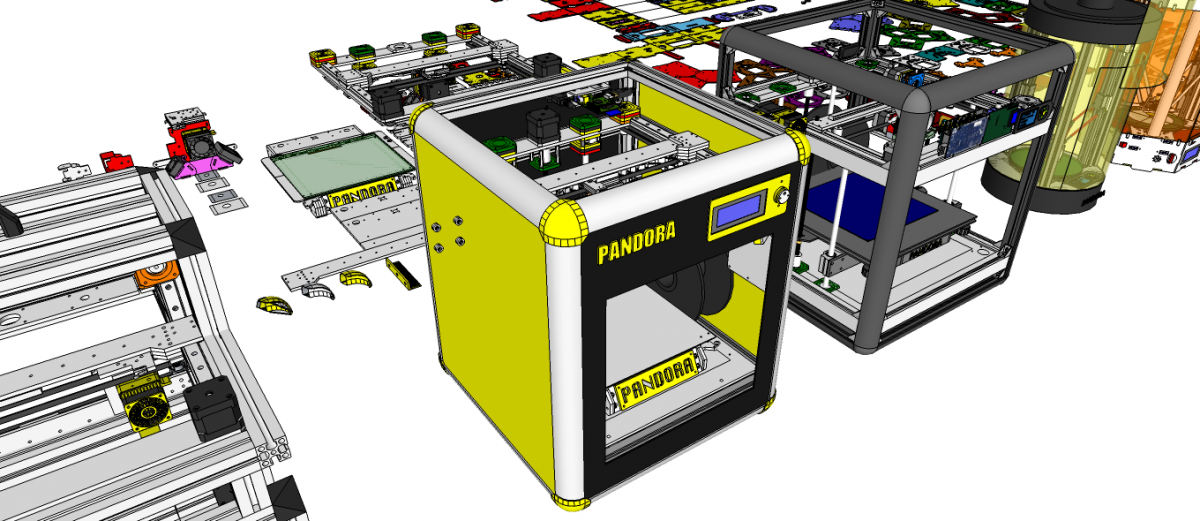
3D Printer: PANDORA DXs – DIY Desktop 3D Printer
3D Design Tool: SketchUp Pro
Robonoid is small sized bipedal walking robot
The robot has 20 freely moveable joints and servomotor in order to provide for a range of action and stable movements. Since it’s small in size, Robonoid can balance well and cope with basic movements such as walking and getting up. Also, intricate movements like roller skating and skateboarding are possible.
Robonoid is a wireless controllable robot
You can control it by WiFi protocol through your PC and Smartphones. App for android and iOS are an especially intelligible UI. By using it, complicated operations can be controlled more easily.
Robonoid is a friendly robot
Robonoid was named indicates a “simply shaped robot” that everyone imagines. Robonoid was designed by pursuing a simple appearance and simple functionality.
Robonoid Lineup
– Papi – 28DOF
– S6 – 20DOF
– S4 – 14DOF
– PSY – 135.7mm(W) x 258.39mm(H) x 100mm(D) – 17DOF
– Jack – 135.7mm(W) x 305.62mm(H) x – 92,48mm(D) – 22DOF
– Gentleman – 135.7mm(W) x 341.22mm(H) x – 78.5mm(D) – 22DOF
– Tony – 135.7mm(W) x 265.5mm(H) x – 100mm(D) – 18DOF
– SpongwBob – 135.7mm(W) x 230.0mm(H) x 100mm(D) – 16DOF
– Hudi – 135.7mm(W) x 251.4mm(H) x 87mm(D) – 19DOF
– Gunmo – 135.7mm(W) x 259.3mm(H) x 78.5mm(D) – 19DOF
– Nova – 135.7mm(W) x 282.8mm(H) x 100mm(D) – 17DOF
– M1 – 180.7mm(W) x 350.74mm(H) x 110mm(D) – 24DOF
– Hexapod H1 – DOM 352.83mm(WD) x 193.16mm(H) – 20DOF
Robonoid is a Plen/mini-Plan/RoboHero robot derivative designed at Zalophus DesignHouse. We love the Plen2 robot but its want to new design. This is our take on a new lower cost version of the Plen2 robot using ES08MA-II/SG90 servo’s.
The 3D printing parts were inspired by the Plen2 components, but they were redrawn from SketchUp to use the inexpensive MG90S servo motors.
Electronic Parts
– 1 x WeMos D1 mini ESP8266 ESP-12
– 1 x PCA9685 16-channel, 12-bit PWM Fm+ I2C-bus Servo controller
– 1 x Robonoid-20CH-R0a Shield
– 1 x HC-SR04 Ultrasonic Distance Measurement Sensor
– 2 x 16340 Battery Holder
– 1 x 2S 7.4V Lithium Battery Charger Protection Board
– 2 x 16340 Batteries
– 1 x DC Jack and Battery Harness Cable
– 20 x ES08MA-II Metal Gear Servo Motors
3D Printing Parts
– Coxa: https://pinshape.com/items/34560
– 3 x Left
– 3 x Right
– Femur: https://pinshape.com/items/34559
– 3 x Left Top
– 3 x Left Bottom
– 3 x Right Top
– 3 x Right Bottom
– Patella: https://pinshape.com/items/34558
– 3 x Left Top
– 3 x Left Bottom
– 3 x Right Top
– 3 x Right Bottom
– Tibia: https://pinshape.com/items/34556
– 3 x Left Top
– 3 x Left Bottom
– 3 x Right Top
– 3 x Right Bottom
– 6 x Tarsus: https://pinshape.com/items/34557
– Shield: https://pinshape.com/items/34561
– 6 x Top
– 6 x Bottom
– 6 x Clip Center
– 12 x Clip Side
– Body: ……………………..Working….
– 1 x Top Plate
– 1 x Bottom Plate
The open source Humanoid Robot – Robonoid hardware and software is free and made with love. Please show your level of support with a voluntary donation.
Donate:
https://www.paypal.com/cgi-bin/webscr?cmd=_s-xclick&hosted_button_id=RDN7ZGAVFS5UE
3D Printed Humanoid Robot – Robonoid – Design concept – 20180619
[20190107] Upload Links
[20181101] Printing
[20180621] Update Design concept
[20180619] Update Design concept
[20180607] Update Design concept
[20180604] Update Design concept
[20180430] Design concept
Humanoid Robot – Robonoid – Design concept – https://youtu.be/n-flpiyNw-M
3D Design Tool: SketchUp Pro
Robonoid is small sized bipedal walking robot The robot has 17 or 19, 24 freely moveable joints and servomotor in order to provide for a range of action and stable movements. Since it’s small in size, Robonoid can balance well and cope with basic movements such as walking and getting up. Also, intricate movements like roller skating and skateboarding are possible.
Robonoid is a wireless controllable robot You can control it by WiFi protocol through your PC and Smartphones. App for android and iOS are an especially intelligible UI. By using it, complicated operations can be controlled more easily.
Robonoid is a friendly robot Robonoid was named indicates a “simply shaped robot” that everyone imagines. Robonoid was designed by pursuing a simple appearance and simple functionality.
Robonoid Lineup
PSY – 135.7mm(W) x 258.39mm(H) x 100mm(D) – 17DOF
Jack – 135.7mm(W) x 305.62mm(H) x – 92,48mm(D) – 22DOF
Gentleman – 135.7mm(W) x 341.22mm(H) x – 78.5mm(D) – 22DOF
Tony – 135.7mm(W) x 265.5mm(H) x – 100mm(D) – 18DOF
SpongwBob – 135.7mm(W) x 230.0mm(H) x 100mm(D) – 16DOF
Hudi – 135.7mm(W) x 251.4mm(H) x 87mm(D) – 19DOF
Gunmo – 135.7mm(W) x 259.3mm(H) x 78.5mm(D) – 19DOF – https://youtu.be/qIZJZDcRpVw
Nova – 135.7mm(W) x 282.8mm(H) x 100mm(D) – 17DOF – https://youtu.be/kzfyKRzp_9I
Hexapod S1 – DOM 352.83mm(WD) x 193.16mm(H) – 20DOF
Robonoid is a Plen/mini-Plan/RoboHero robot derivative designed at Zalophus DesignHouse. We love the Plen2 robot but its want to new design. This is our take on a new lower cost version of the Plen2 robot using MG90S/ES08MA-II/SG90 servo’s.
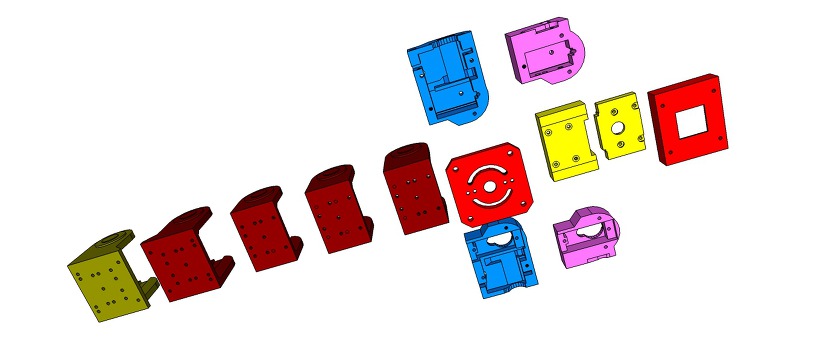
The 3D printing parts were inspired by the Plen2 components, but they were redrawn from SketchUp to use the inexpensive MG90S servo motors.
Electronic Parts
1 x WeMos D1 mini ESP8266 ESP-12
1 x PCA9685 16-channel, 12-bit PWM Fm+ I2C-bus Servo controller
1 x Shield Robonoid-20CH-R0a
1 x HC-SR04 Ultrasonic Distance Measurement Sensor
2 x 16340 or 18650 Battery Holder
1 x 2S 7.4V Lithium Battery Charger Protection Board
2 x 16340 or 18650 Batteries
2 x Snap-In Single ‘A’-‘AA’ Battery Contacts 209 [KEYSTONE ELECTRONICS CORP.]
2 x Snap-In Single ‘A’-‘AA’ Battery Contacts 228 [KEYSTONE ELECTRONICS CORP.]
1 x DC Jack and Battery Harness Cable
17/19 x MG90S Metal Gear Servo Motors
3D Printing Parts
- Robonoid_BatteryBracket16340.stl ……https://pinshape.com/items/49080
- Robonoid_BatteryHolder18650.stl …..https://pinshape.com/items/49082
- Robonoid_BodyGentleman.stl ……..https://pinshape.com/items/49105
- Robonoid_BodyGunmo.stl …….https://pinshape.com/items/49100
- Robonoid_BodyHudi.stl ……https://pinshape.com/items/49098
- Robonoid_BodyNovaL.stl …….https://pinshape.com/items/49101
- Robonoid_BodySpongeBob.stl ……………”
- Robonoid_BodyNovaS.stl …..https://pinshape.com/items/49103
- Robonoid_BodyTony.stl …….https://pinshape.com/items/49102
- Robonoid_BodyTonyPants.stl ……”
- Robonoid_BodyTonyServoBracket.stl ……”
Robonoid_CapBaseball.stl ……https://pinshape.com/items/49095 - Robonoid_CapHudi.stl ………………..”
Robonoid_eYeLED5.stl ……….https://pinshape.com/items/49106
Robonoid_eYeWS2812.stl …….https://pinshape.com/items/49107
Robonoid_HatBoaterGunmo.stl ……https://pinshape.com/items/49093 - Robonoid_HatConical.stl ……………….”
- Robonoid_HatFes.stl ……………………..”
- Robonoid_HatTC.stl ……………………..”
- Robonoid_HatTop.stl …………………….”
Robonoid_Head.stl ……https://pinshape.com/items/49091
Robonoid_HeadNova.stl …….https://pinshape.com/items/49000
Robonoid_ElbowShoulderRol_Leftl.stl …….https://pinshape.com/items/49071
Robonoid_Foot_Left.stl …….https://pinshape.com/items/49057
Robonoid_FootSlim_Left.stl …….https://pinshape.com/items/49057
Robonoid_FootSimple_Left.stl ……..https://pinshape.com/items/49057
Robonoid_FootRollPitch_Left.stl …….https://pinshape.com/items/49063
Robonoid_Hand_Left.stl ……..https://pinshape.com/items/49070
Robonoid_HandWristShoulderPitchThighYawFoot_Left.stl ….https://pinshape.com/items/49072
Robonoid_Knee_Left.stl ……https://pinshape.com/items/49064
Robonoid_KneePitch_Left.stl ……..https://pinshape.com/items/49067
Robonoid_ShoulderPitch_Left.stl ……..https://pinshape.com/items/49072
Robonoid_ThighPitchHipRollNova_Left.stl ……..https://pinshape.com/items/49068
Robonoid_ThighPitchRoll_Left.stl ……https://pinshape.com/items/49063
Robonoid_Pants.stl …….https://pinshape.com/items/49105
Robonoid_PantsBottom.stl ……………”
WANT TO SUPPORT Zalophus’s DesignHouse?
The open source Humanoid Robot – Robonoid hardware and software is free and made with love. Please show your level of support with a voluntary donation.
Donate: https://www.paypal.com/cgi-bin/webscr?cmd=_s-xclick&hosted_button_id=RDN7ZGAVFS5UE
Setting up the Arduino IDE on Raspbian
If you have used the Sleepy Pi setup script you DO NOT need to do this. The script has already set this up for you.
Contents [hide]
The following instructions relate to installation on the standard Raspberry Pi Operating System (OS) Raspbian. Following the principals shown here, it should be possible to apply these same modifications to other Raspberry OS’s.
The Arduino processor on the Sleepy Pi can be programmed directly from the Arduino IDE running on the Raspberry Pi.
The first step is to load the Arduino environment onto the Raspberry Pi. If you haven’t already done so, it’s a good idea to ensure that your Raspbian is up to date by opening up an LXTerminal window and executing the following:
|
1 2 |
$ sudo apt–get update $ sudo apt–get dist–upgrade |
Note the dist-upgrade will ensure that you have the latest versions of RPi.GPIO which will be required later.
Now install the Arduino IDE with:
|
1 |
$ sudo apt–get install arduino |
(click Y to any dependencies)
Setting up the Serial Pins
The Arduino processor on the Sleepy Pi can be programmed directly from the Raspberry Pi using the serial GPIO lines on the RPi and another GPIO line to reset the the Arduino to allow automatic code upload. These pins are:
GPIO 14: TXD
GPIO 15: RXD
GPIO 22: Reset (see next section)
By default Raspbian has exclusive access to the serial pins to output status, debug data and logging in. We need to change that using the following steps.
Step 1: Disable Serial login
Wheezy
Raspbian allows you to login using the serial port. To use the Sleepy Pi we need to disable this. To do this, we need to edit /etc/inittab.
In an LXTerminal window type:
|
1 |
$ sudo nano /etc/inittab |
Scroll down the bottom and you will find the lines:
|
1 2 |
#Spawn a getty on Raspberry Pi Serial line T0:23:respawn:/sbin/getty –L ttyAMA0 115200 vt100 |
You need to comment the last line out (i.e. disabling it) with a “#” and save it, so that it results in:
|
1 2 |
#Spawn a getty on Raspberry Pi Serial line #T0:23:respawn:/sbin/getty -L ttyAMA0 115200 vt100 |
Jessie and Raspberry Pi 3
Raspbian Jessie no longer has the /etc/inittab file and replaces it instead with a mechanism called systemd and you use a tool called systemctl to enable / disable services.
In a terminal type the following commands, for all Raspberry Pi’s except Raspberry Pi 3:
|
1 2 |
$ sudo systemctl stop serial–getty@ttyAMA0.service $ sudo systemctl disable serial–getty@ttyAMA0.service |
Instead, for Raspberry Pi 3:
|
1 2 |
$ sudo systemctl stop serial–getty@ttyS0.service $ sudo systemctl disable serial–getty@ttyS0.service |
On Jessie, you also need to enable the serial port in either rasp-config of in /boot/config.txt with:
|
1 |
$ sudo nano /boot/config.txt |
and add the line:
|
1 |
enable_uart=1 |
Step 2. Disable Boot info
When Raspbian boots up it outputs boot information to the serial port and hence streams it to the Sleepy Pi (which is not particularly interested in it). To disable this we need to edit the /boot/cmdline.txt in LXTerminal:
|
1 |
$ sudo nano /boot/cmdline.txt |
It will look something like:
|
1 |
dwc_otg.lpm_enable=0 console=serial0,115200 console=tty1 root=/dev/mmcblk0p6 rootfstype=ext4 elevator=deadline rootwait |
Delete the “console=serail0,115200″ parts so that you are left with:
|
1 |
dwc_otg.lpm_enable=0 console=tty1 root=/dev/mmcblk0p6 rootfstype=ext4 elevator=deadline rootwait |
This is the file I use:
![]()
Cmdline.txt 0.09 KB
Step 3. Link the Serial port to the Arduino IDE
NOTE: For Raspberry Pi 3 Omit Step 3 – /dev/ttyS0 is the default mapping not /dev/ttyAMA0 which is used for the Bluetooth.
The Arduino IDE wants to use the /dev/ttyS0 serial port, but we need to use the /dev/ttyAMA0 which is linked to the GPIO. In order to do this we need to create a permanent link that maps AMA0 to S0. To this we need to create a small file. We can do this in LXTerminal by the following sequence:
|
1 |
$ sudo nano |
In the new file that it creates type the following:
|
1 2 |
KERNEL==“ttyAMA0”, SYMLINK+=“ttyS0”,GROUP=“dialout”,MODE:=0666 KERNEL==“ttyACM0”, SYMLINK+=“ttyS1”,GROUP=“dialout”,MODE:=0666 |
Save this file as a new file called “80-sleepypi.rules” to: /etc/udev/rules.d/
This is the one I use:
![]()
80-sleepypi.rules 0.12 KB
Setting up the Reset (DTR) pin
The Sleepy Pi Arduino processor reset line in connected to GPIO 22. To automatically upload code from the Arduino IDE we need to pulse this line low to rest the Arduino and enter bootload mode.
On a normal Arduino system connected to a computer via a USB / serial cable the reset line is connected to the DTR line. To replicate this behavior on the Raspberry Pi we need to hack the AVRDude programming software. Dean Mao has detailed a great hack for this. He’s produced a modified version of Avrdude (avrdude-autoreset) and written a piece of python code (autoreset) that runs in the background and pulses the GPIO line when required.
Download the avrdude-rpi files from Github . Select “Download ZIP” file which will download the file into your /home/pidirectory.
NOTE: this is a subtly modified version of the original Dean Mao version so only use this version.
Open up a File Manager window from the bottom toolbar, locate the ZIP file in your /home/Pi directory and right-click and select xarchiver to extract the files to a folder in /home/Pi. These will extract into a folder named “avrdude-rpi-master“.
If you are using a terminal rather than the GUI, you can use the following from the command lines to download and unzip :
|
1 2 |
wget https://github.com/SpellFoundry/avrdude-rpi/archive/master.zip sudo unzip master.zip |
Next, copy the files to the appropriate places from a LXTerminal window using the following commands:
|
1 2 3 4 |
$ cd ./avrdude–rpi–master/ $ sudo cp autoreset /usr/bin $ sudo cp avrdude–autoreset /usr/bin $ sudo mv /usr/bin/avrdude /usr/bin/avrdude–original |
This renames your original avrdude, so that you have a backup and can replace it with the new one.
|
1 |
$ sudo ln –s /usr/bin/avrdude–autoreset /usr/bin/avrdude |
Then link the new avrdude-autoreset to avrdude with the ‘ln” command so that when something calls for avrdude, the new version runs instead.
Adding the Sleepy Pi to the Arduino environment
To enable the Sleepy Pi to be selected from the IDE you need to add a folder and file to your sketchbook. If it is a fresh install and you haven’t yet run the Arduino environment you’ll need to create a sketchbook folder (skip this step if it already exists).
In LXTerminal type:
|
1 2 3 |
$ mkdir /home/pi/sketchbook $ mkdir /home/pi/sketchbook/hardware $ mkdir /home/pi/sketchbook/hardware/Sleepy_pi |
to create folders “hardware” and “sleepy pi” in your Arduino sketchbook.
Download and copy the boards.txt file to the Sleepy Pi folder.
![]()
Boards.txt 0.60 KB
This file should look like this:
|
1 2 3 4 5 6 7 8 9 10 11 12 13 14 15 |
sleepypi.name=Sleepy Pi sleepypi.upload.protocol=arduino sleepypi.upload.maximum_size=30720 sleepypi.upload.speed=57600 sleepypi.bootloader.low_fuses=0xFF sleepypi.bootloader.high_fuses=0xDA sleepypi.bootloader.extended_fuses=0x05 sleepypi.bootloader.path=arduino:atmega sleepypi.bootloader.file=ATmegaBOOT_168_atmega328_pro_8MHz.hex sleepypi.bootloader.unlock_bits=0x3F sleepypi.bootloader.lock_bits=0x0F sleepypi.build.mcu=atmega328p sleepypi.build.f_cpu=8000000L sleepypi.build.core=arduino:arduino sleepypi.build.variant=arduino:standard |
Reboot
And finally reboot your Raspberry Pi to complete and load all our changes. You can use:
|
1 |
$ sudo reboot |
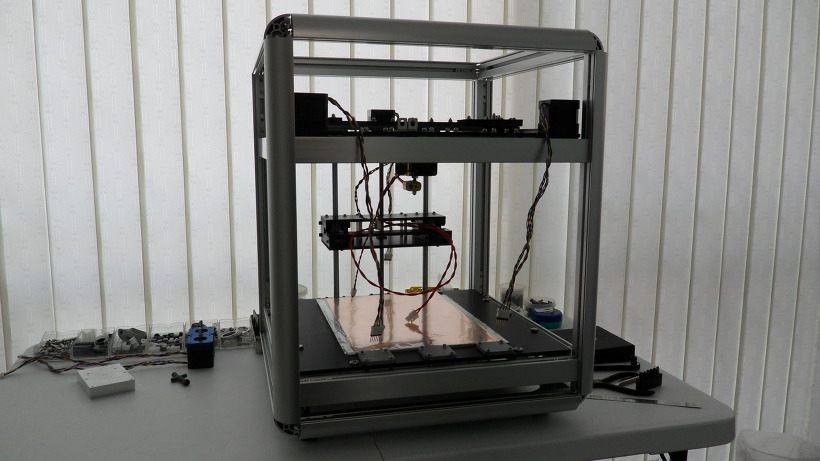
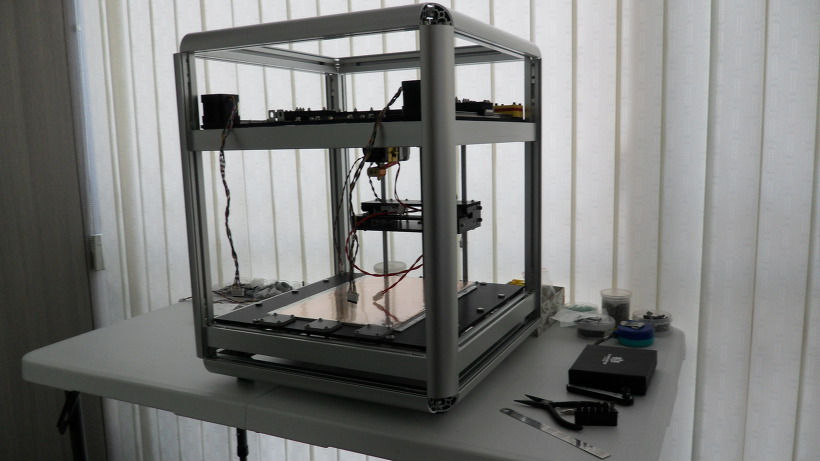
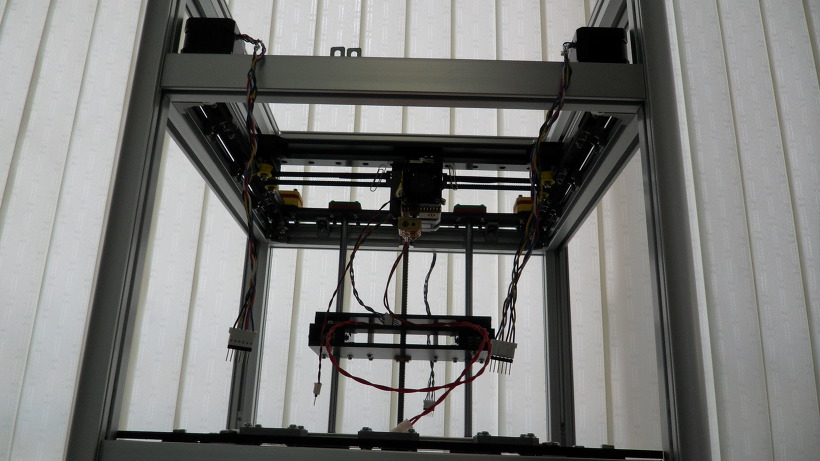
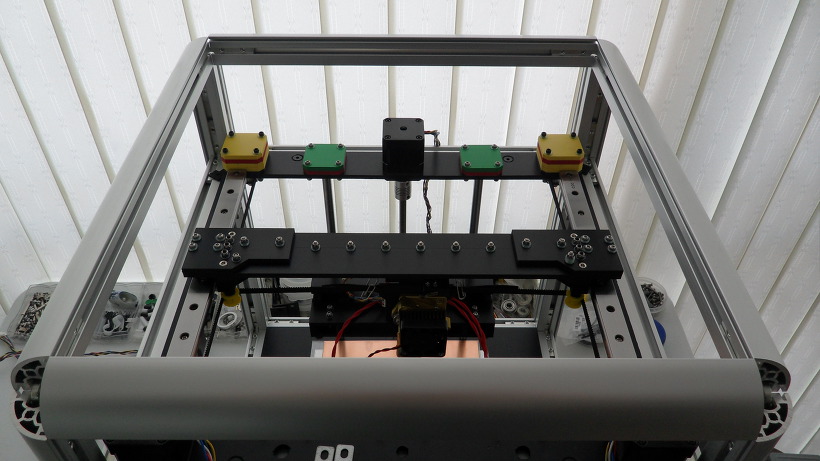
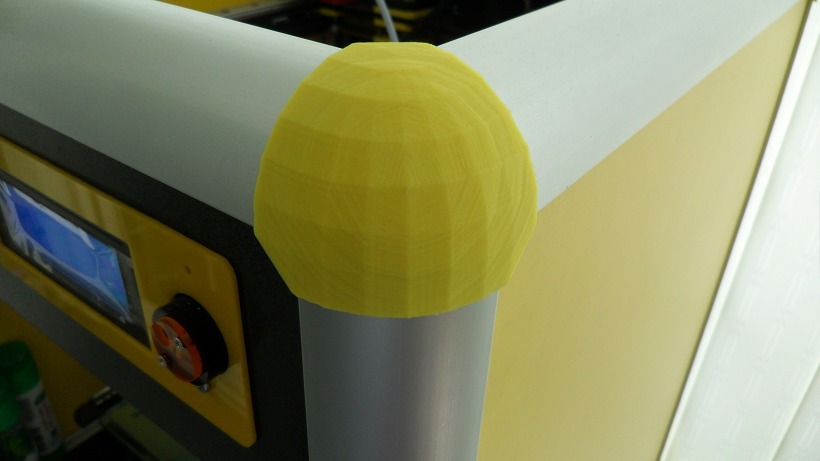
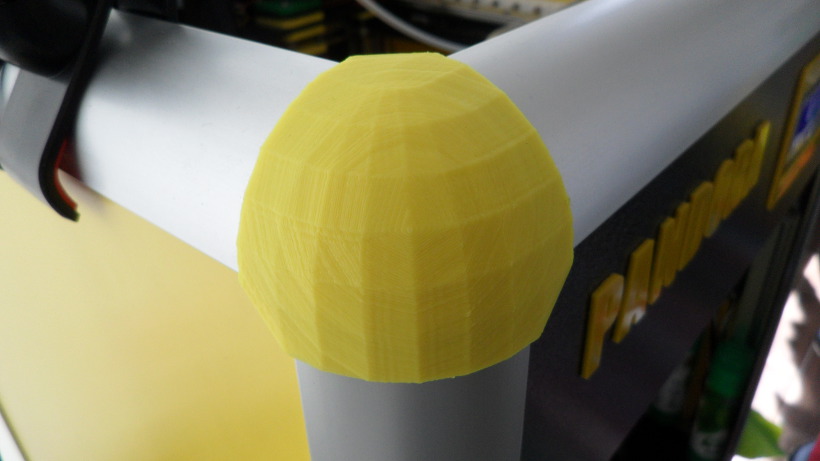
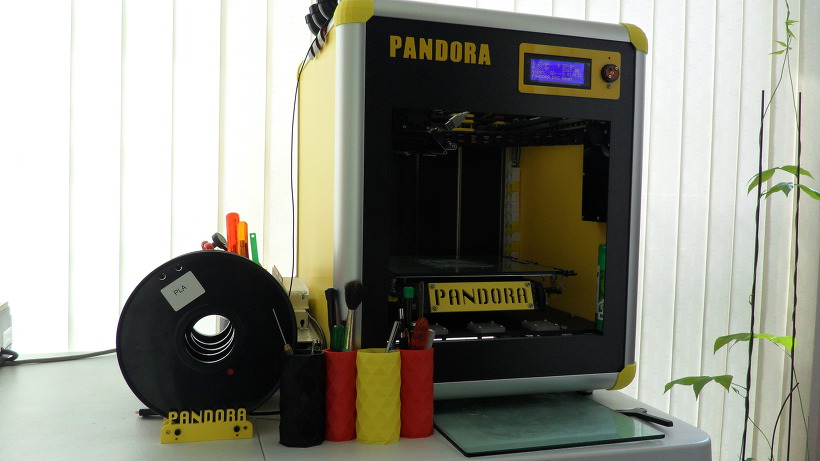
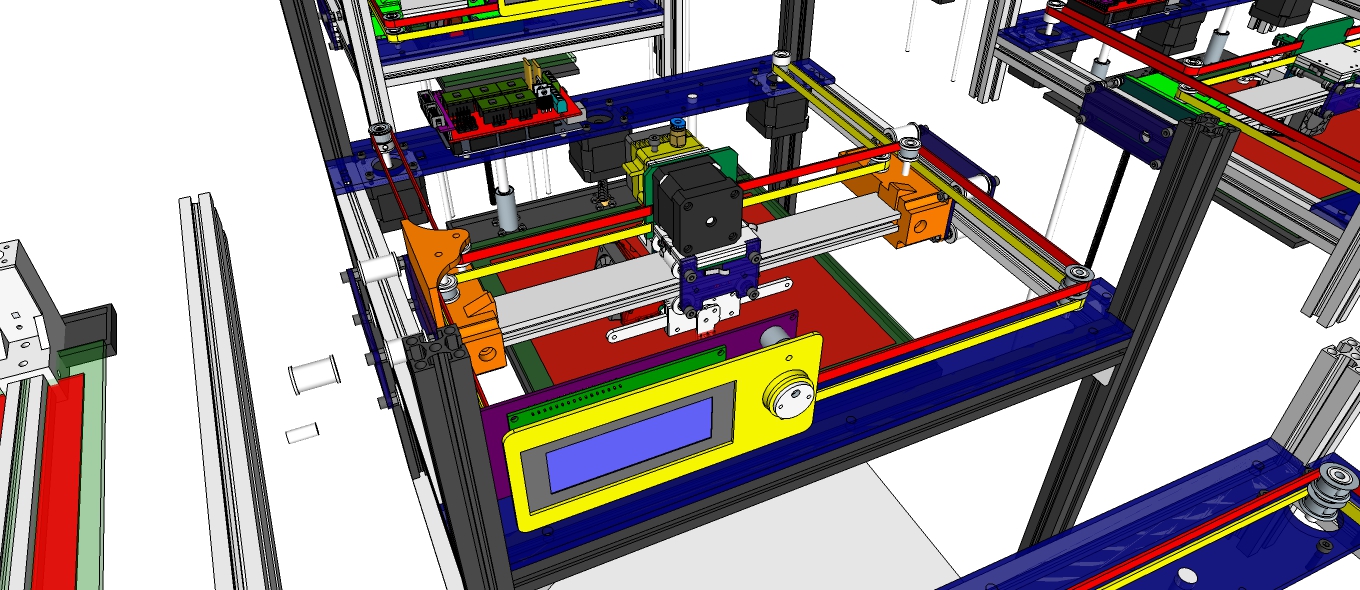
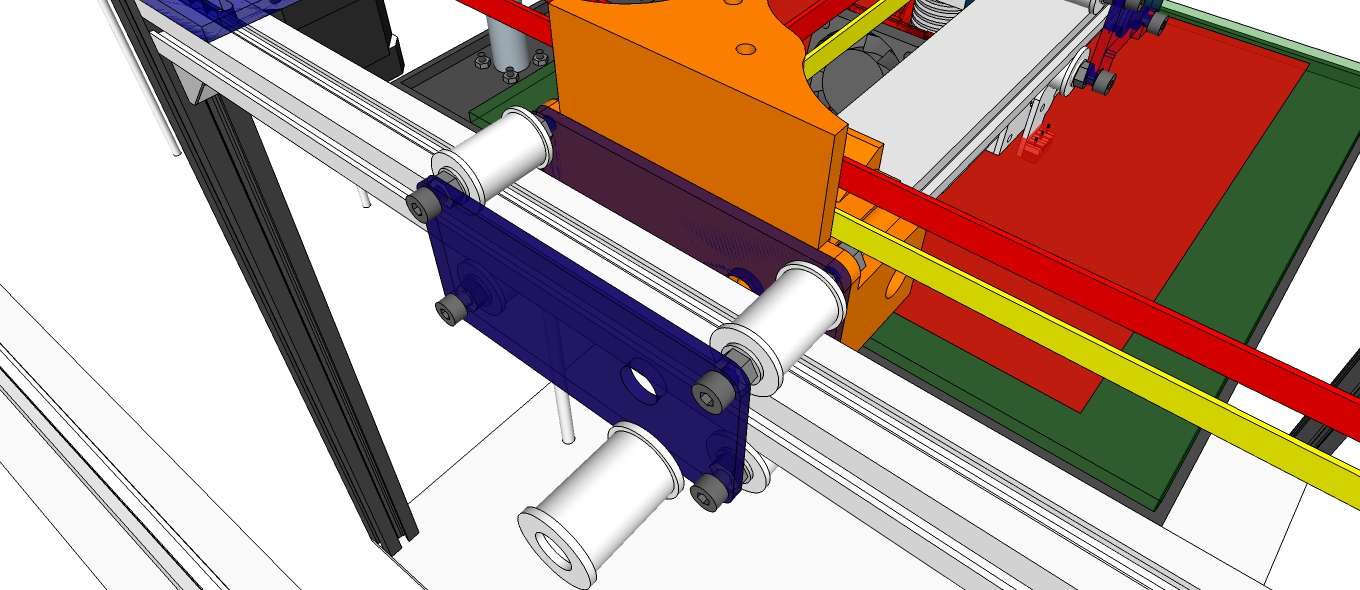
PANDORA Junior DXs – 3D Design Concept
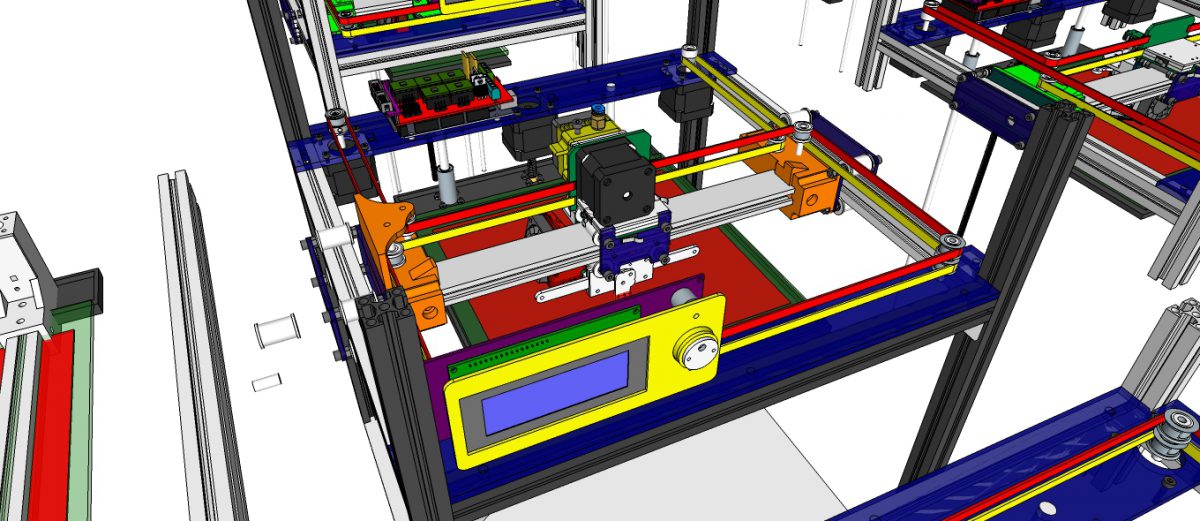
DIY 3D Printer – PANDORA Junior DXs (Design eXtreme single)
3D Design Tool: SketchUp Pro
Technical Specifications
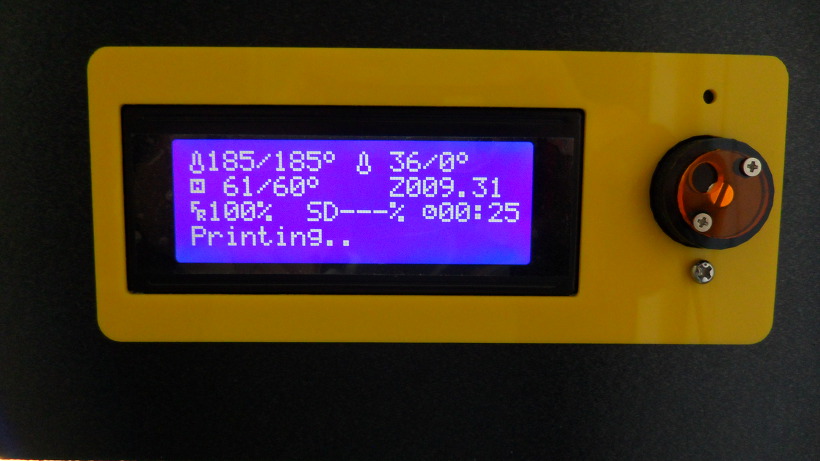
Printing
Technology: FFF(Fused Filament Fabrication) / CoreXY
Build Volume: 223 (W) x 207 (D) x 250 (H) mm – Heatbed
Layer Resolution: 50 ~ 200 microns
Filament: ABS or PLA, Nyron, HIPS, PVA… 1.75 mm diameter
Nozzle Diameter: 0.4 mm (0.2mm, 0.3mm, 0.8mm)
Print File Type: .Code, .STL
Layer Resolutions:
- Fast: 200 micron (0.2 mm)
- Normal: 100 micron (0.1 mm)
- hHigh: 0.06 micron (0.06 mm)
- Ultra High: 0,04 micron (0.04 mm)
Size and Weight
Product Dimensions: 410 (W) x 410 (D) x 485 (H) mm
Product Weight: 11 kg(?)
Software
Software Bundle: Cura, Slic3r, KISSlicer / Octoprint, Printrun, Repetier-Host, MatterControl
Supported File Types: .STL, .OBJ, .AMF, .Gcode
Operating Systems: All (Web-based): Windows, Mac OS, Linux
Firmware
Arduino: Modified Marlin v1.0.2-2
Raspberry Pi: Rasbian, Octoprint, SSH, Samba, VNC, WiringPi
Hardware
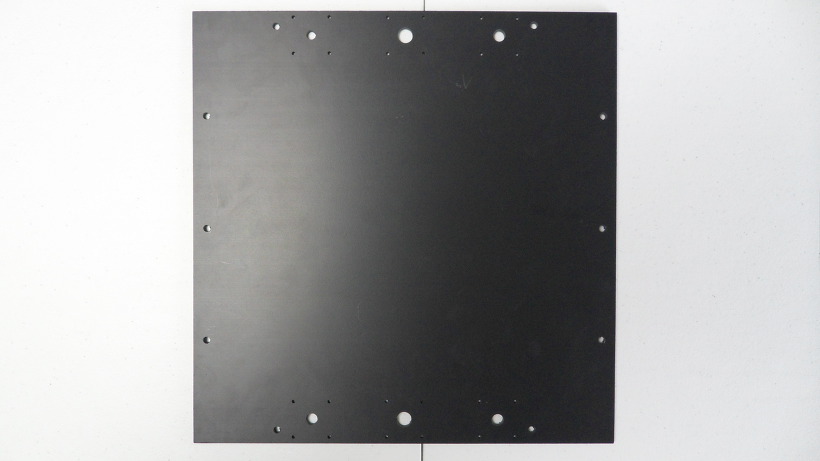
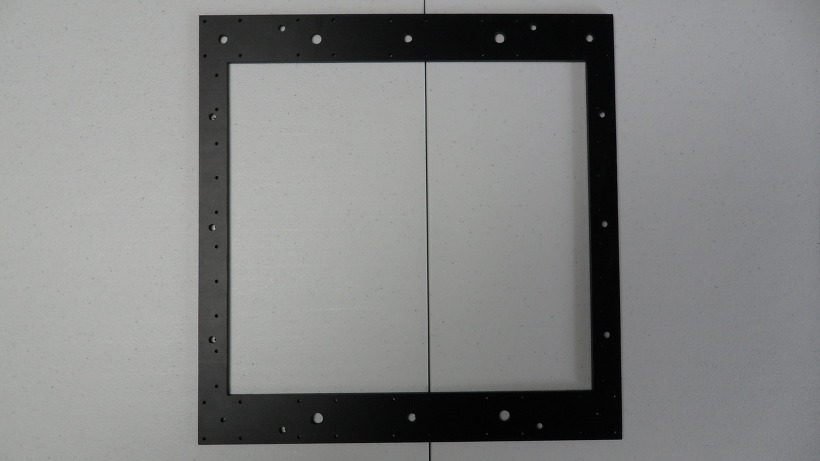
Base Plate: Profile DRF 2020, Acrylic
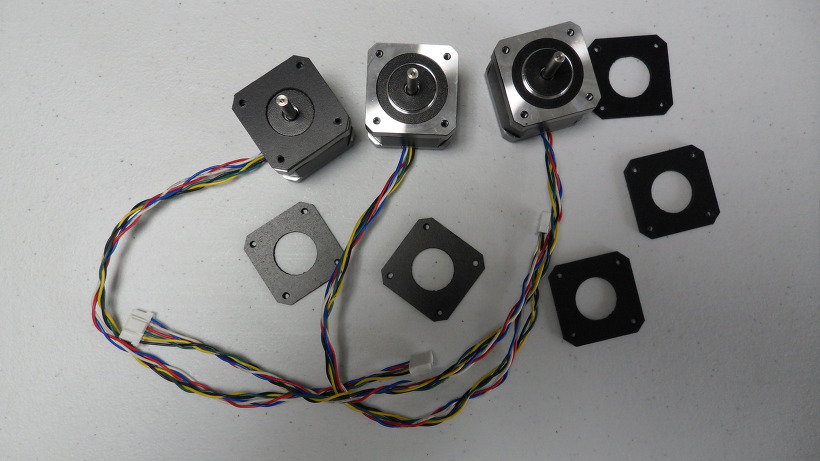
Step Motor: NEMA 17 – Phase: 4, Step Angle: 1.8 Deg/Step, Holding Torque: 2.6Kg.cm
- X/Y/Z/E – 4EA
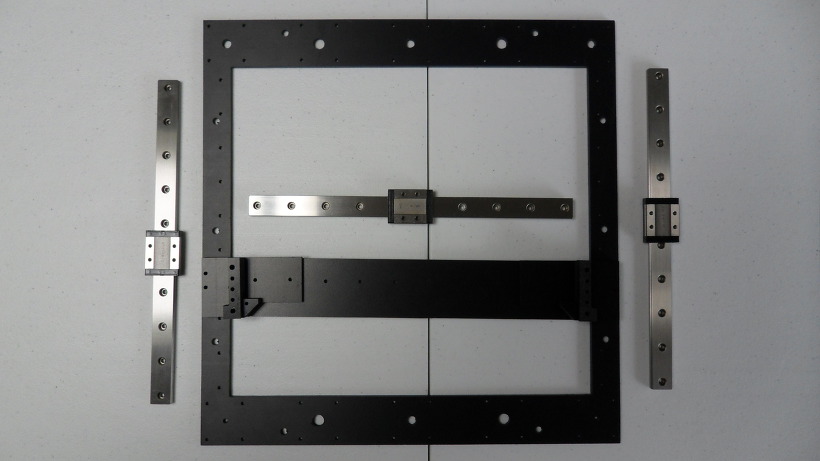
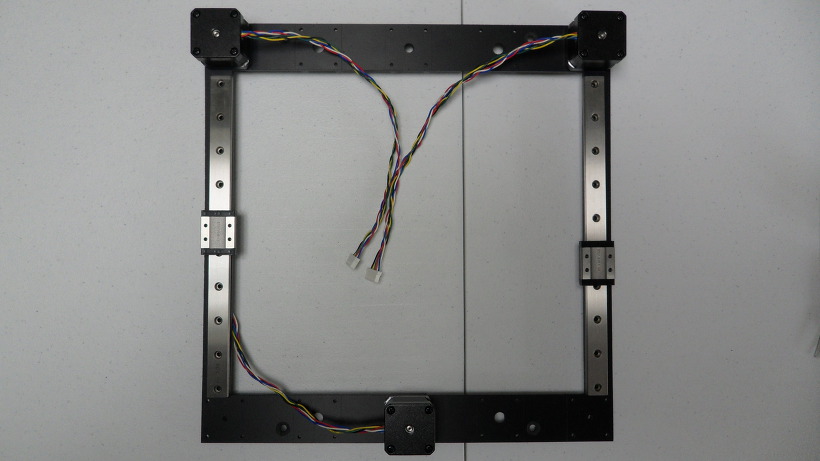
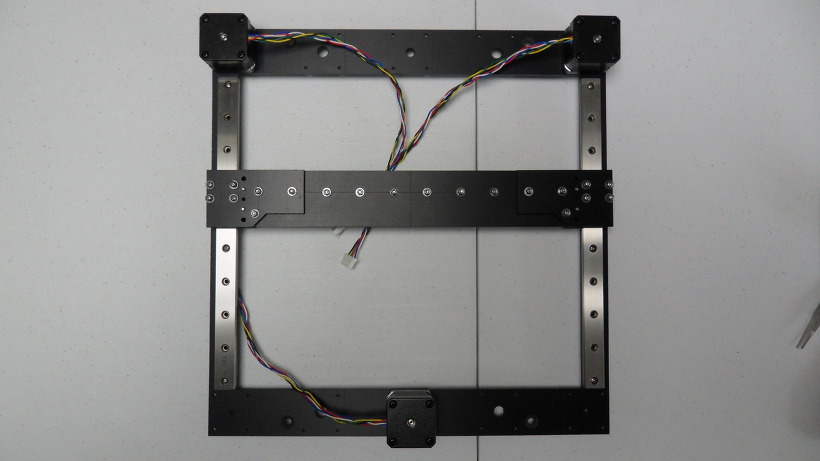
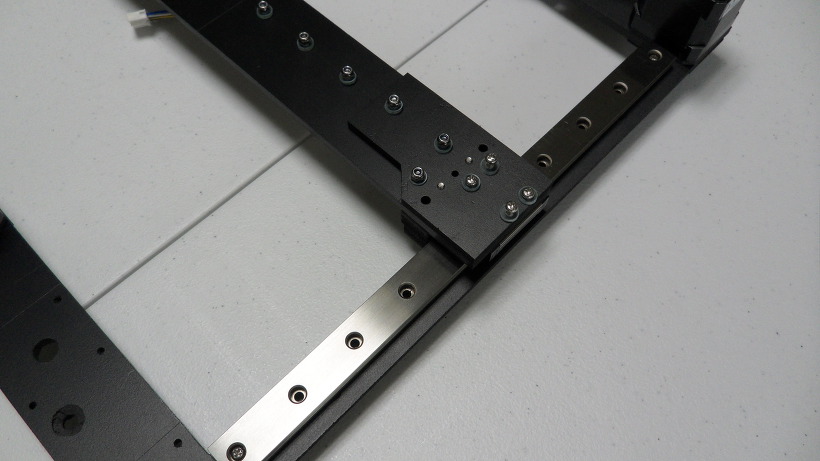
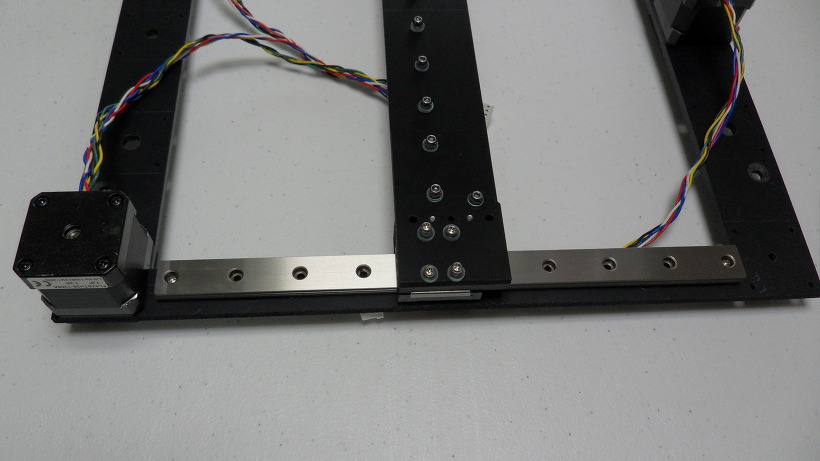
Cartesian (xyz): X/Y Head: Profile DRF 2020, Z Bed: 10mm Linear Shaft and 8D Screw Rod
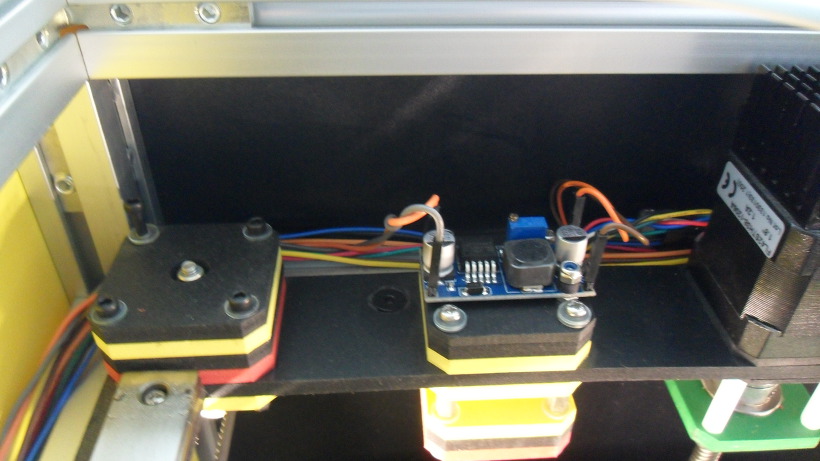
Electrical
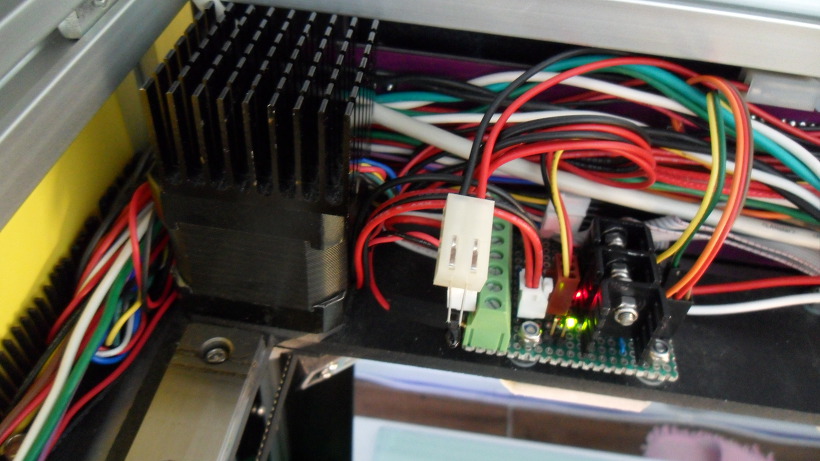
Control Board: Arduino Mega 2560
Control Shield: Ramps 1.4 Board
Display Board: Reprap Discount Smart Controller LCD 2004
Raspberry Pi: Raspberry Pi 2/3
Camera: Raspberry Camera
Power Requirements: AC 100 – 240 V, 1.4 Amps, 50-60 Hz, 220 W
Connectivity: USB, SD Card, Wi-Fi (Web-based)
Temperature:
- Nozzle temperature: 170 – 270
- Heated bed temperature: 50 – 100
- Operational temperature: 10 – 40
- Storage temperature: 0 – 32
Thanks for watching!……..Coming soon!……..Updating……
Blog:
http://zddh.blogspot.kr/2017/12/pandora-junior-dxs-3d-design-concept.html
The open source PANDORA DXs hardware and software is free and made with love. Please show your level of support with a voluntary donation.
Donate:
https://www.paypal.com/cgi-bin/webscr?cmd=_s-xclick&hosted_button_id=RDN7ZGAVFS5UE

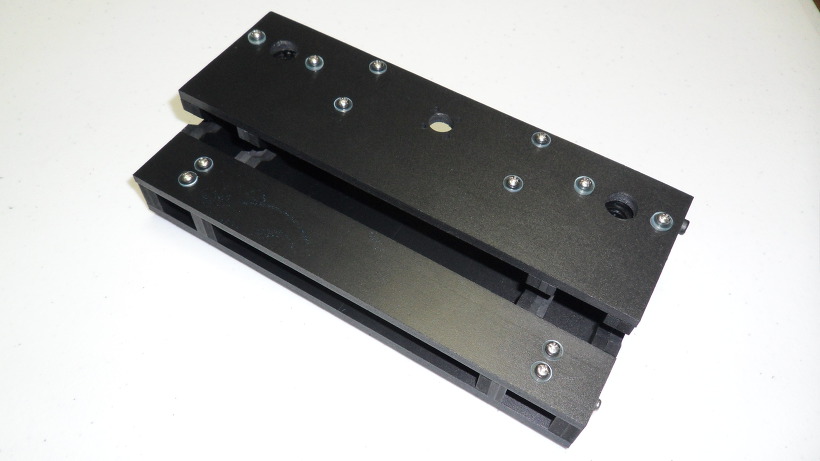
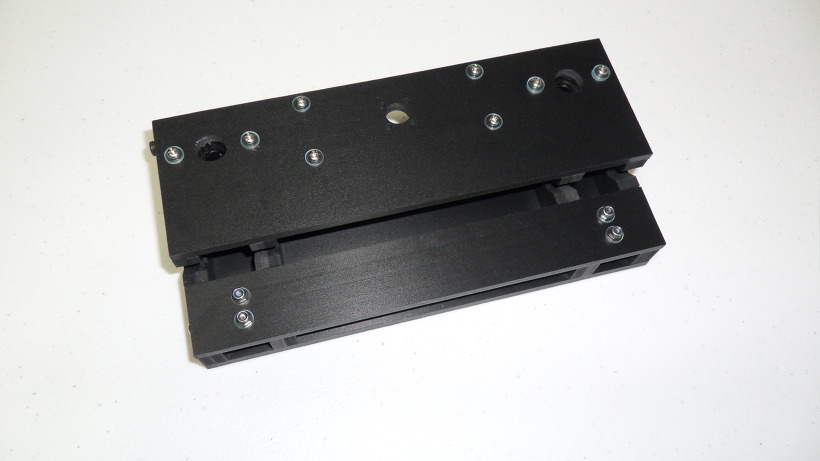
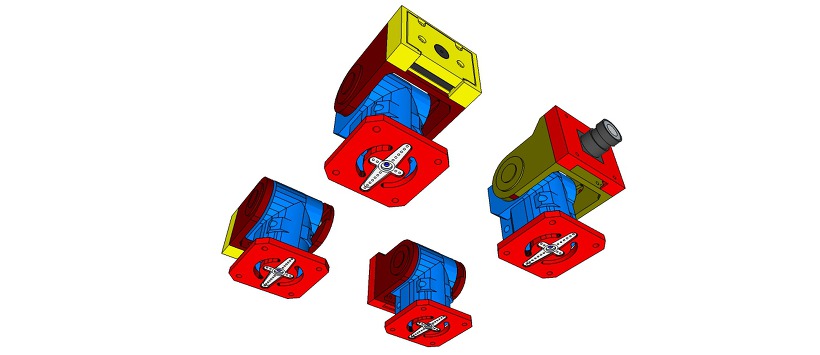
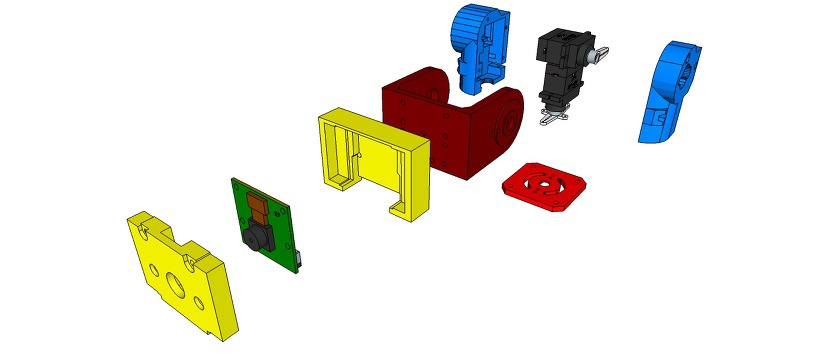
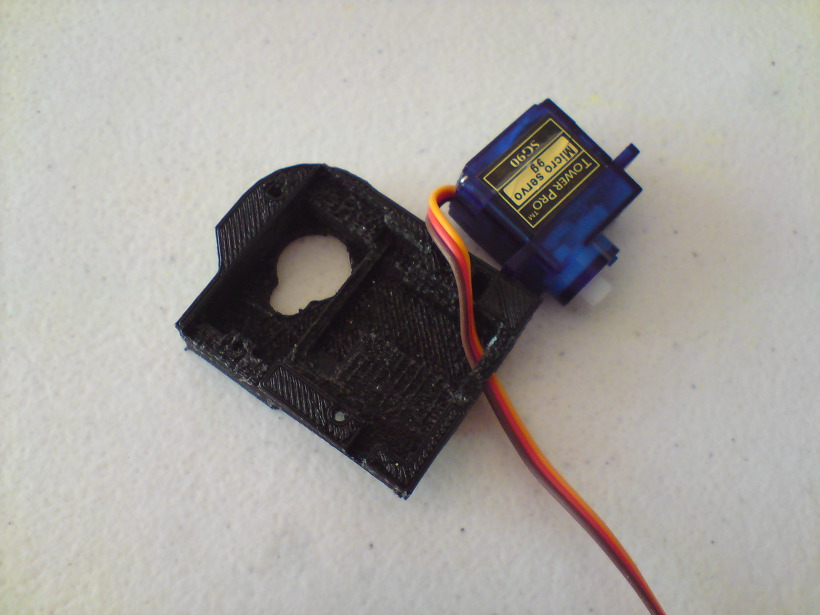
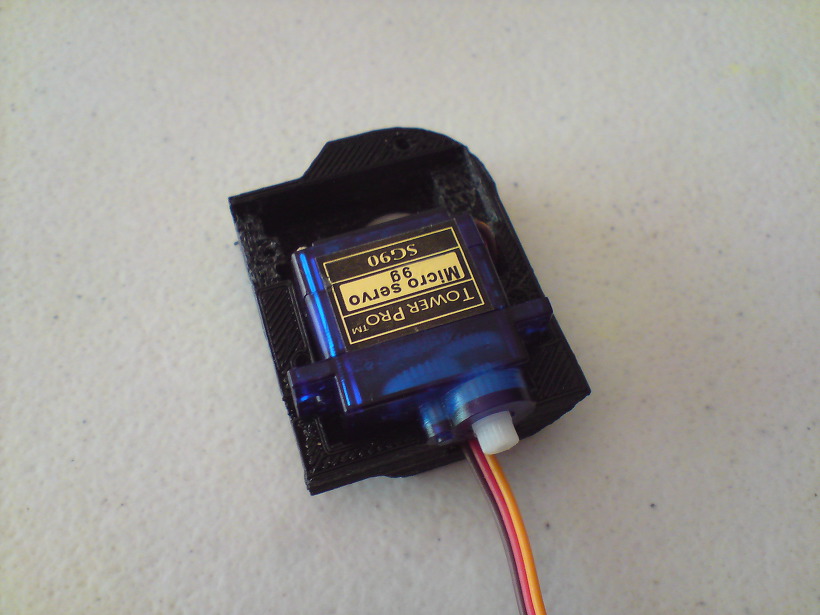
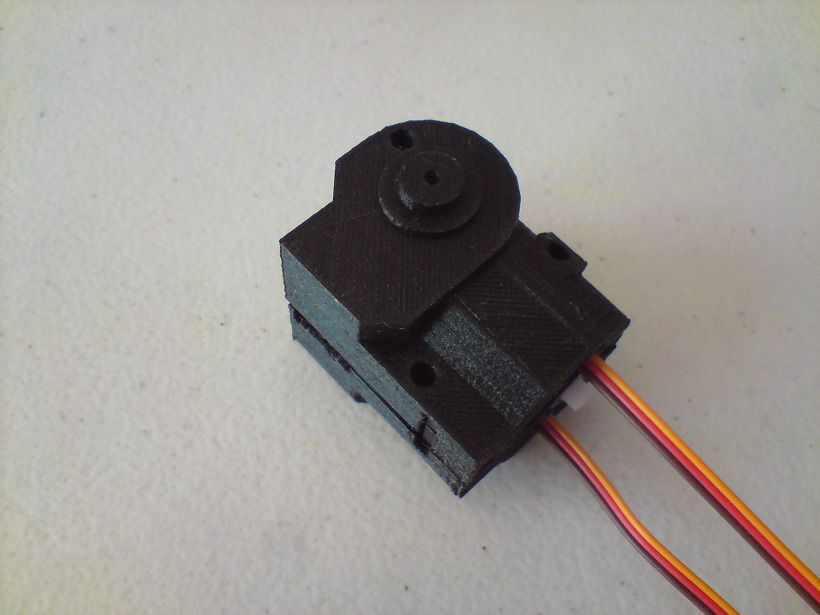
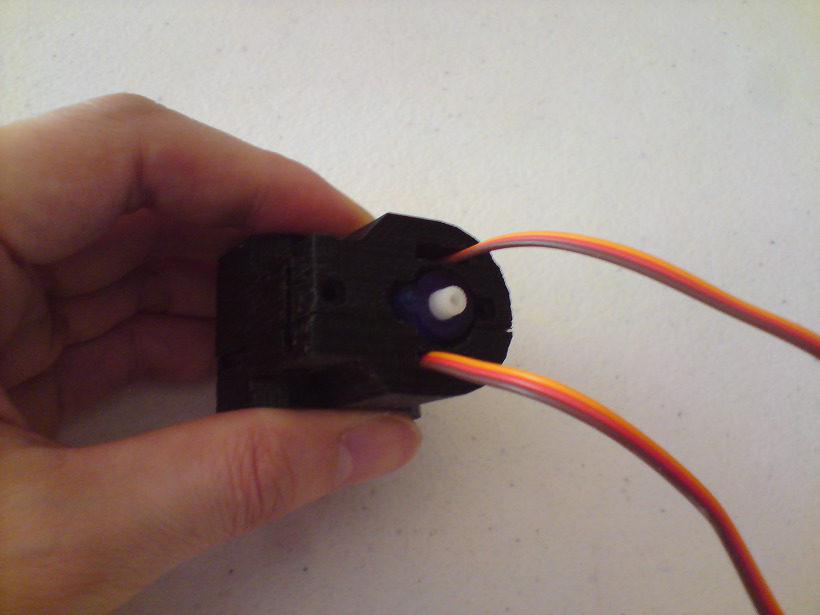
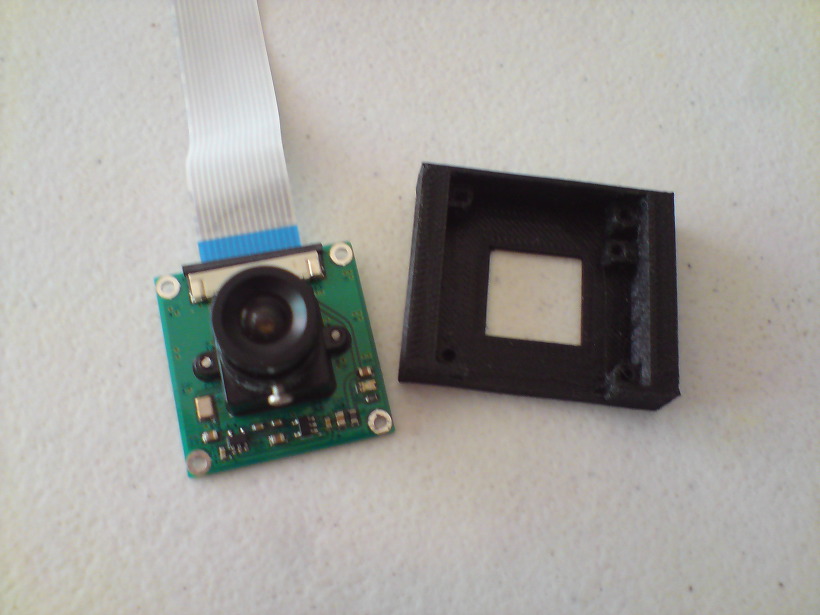
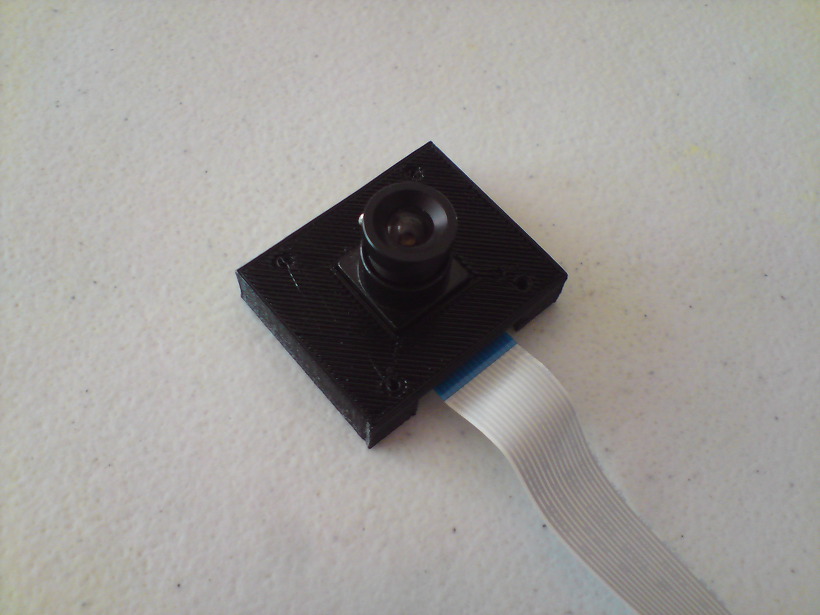
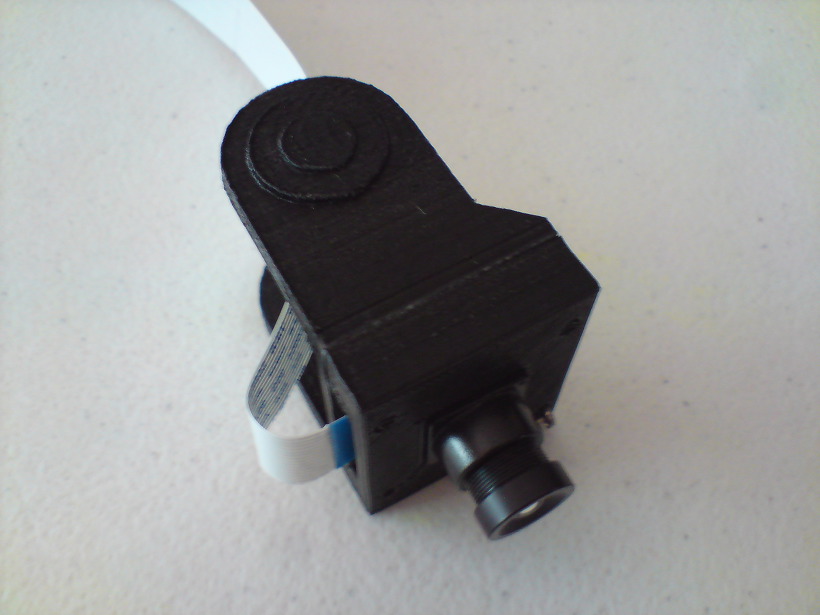
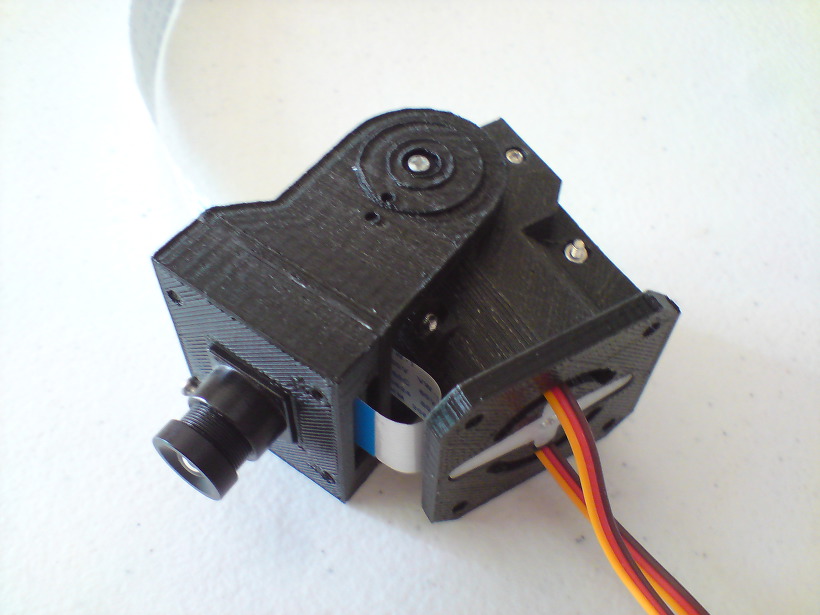
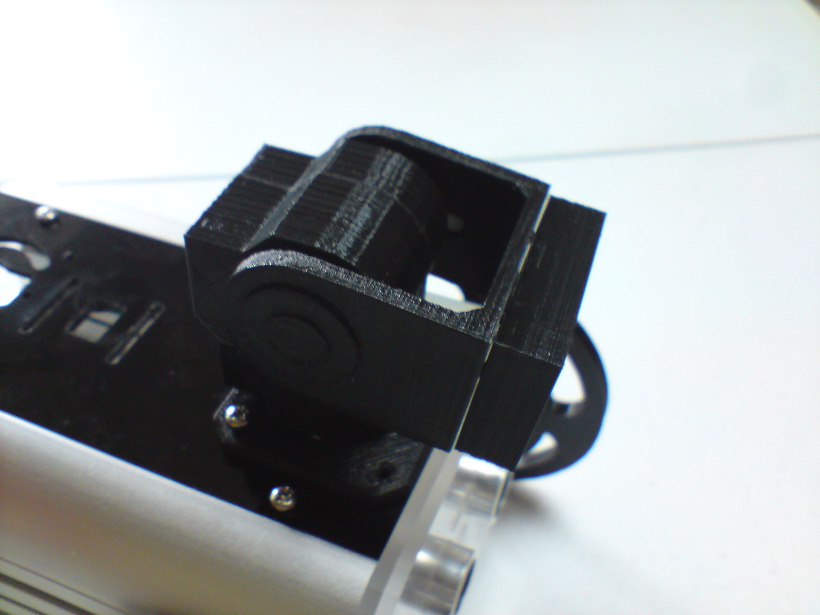
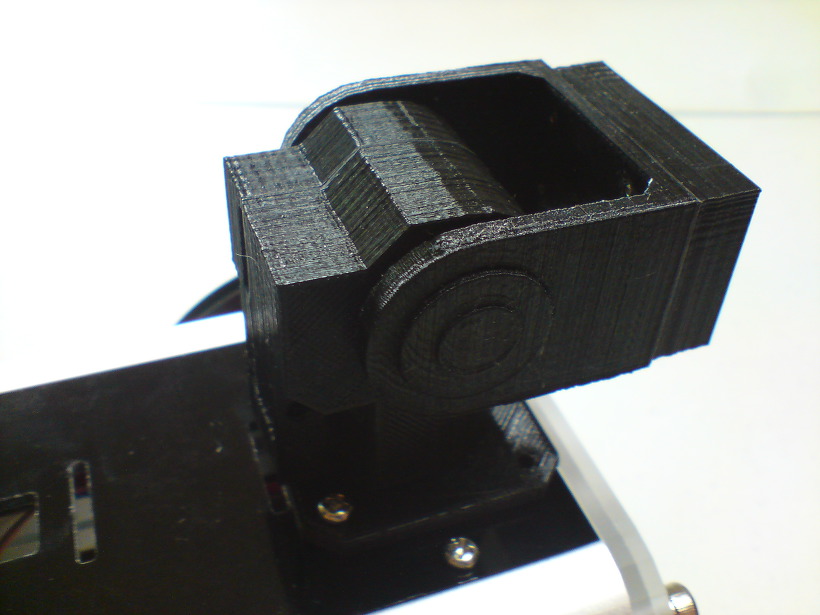
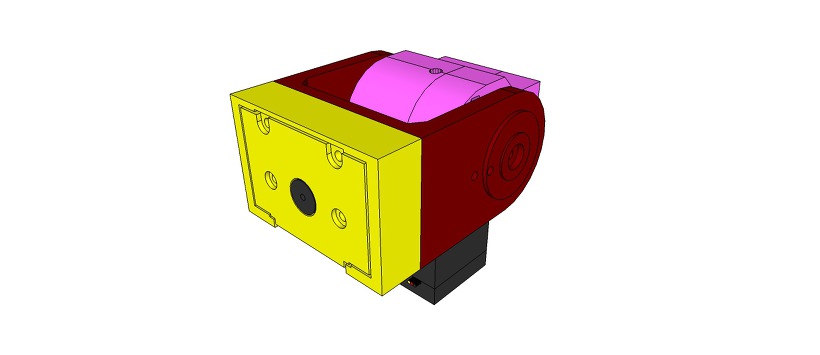
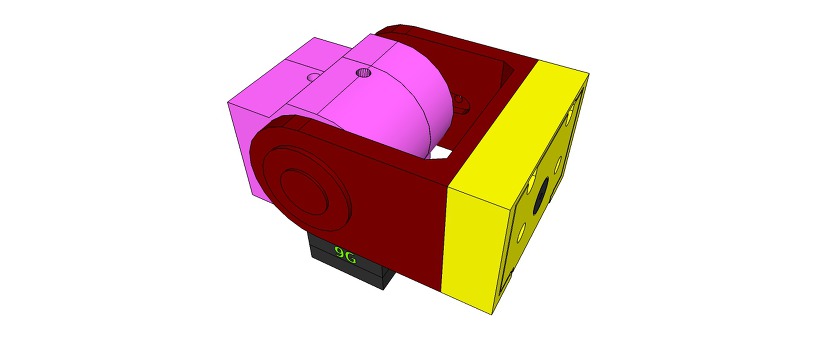
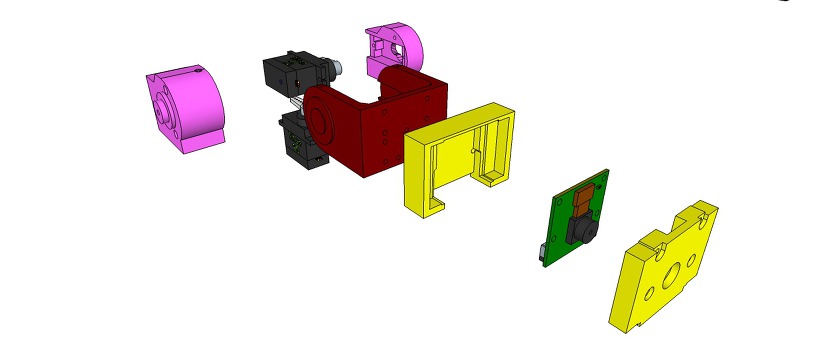
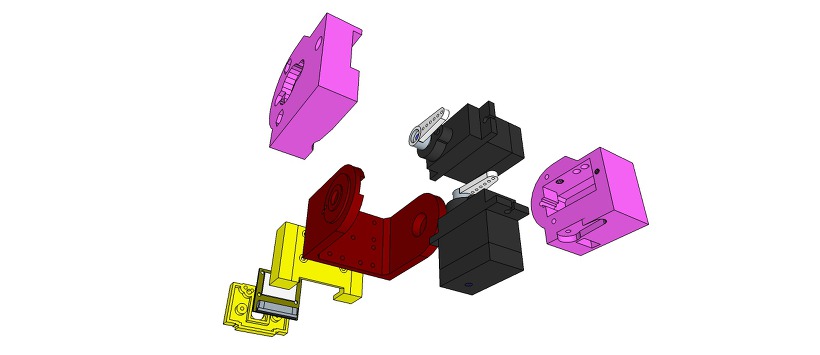
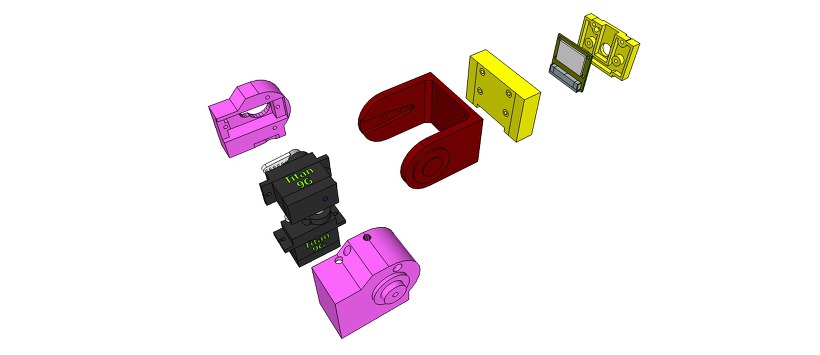
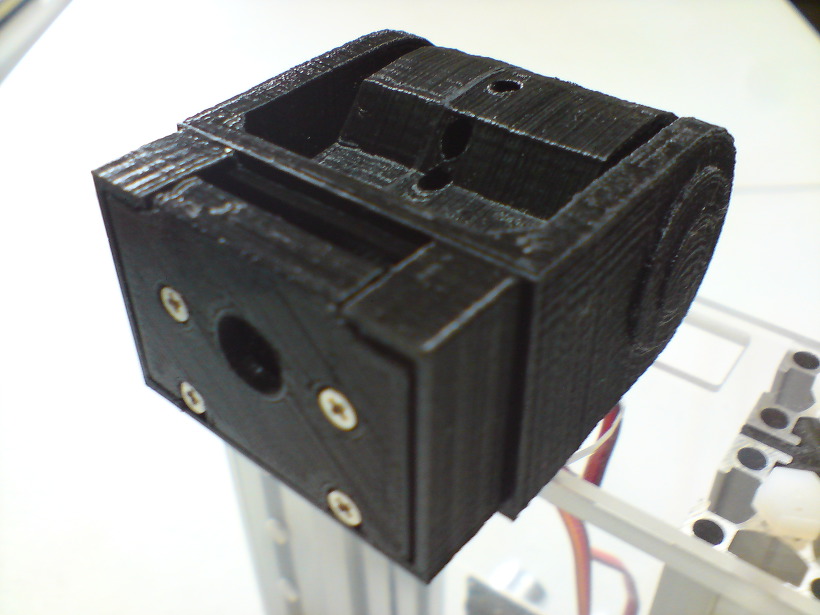
Super Ultra Compact Pan/Tilt Camera Mount – V2


[Publish 20161001]
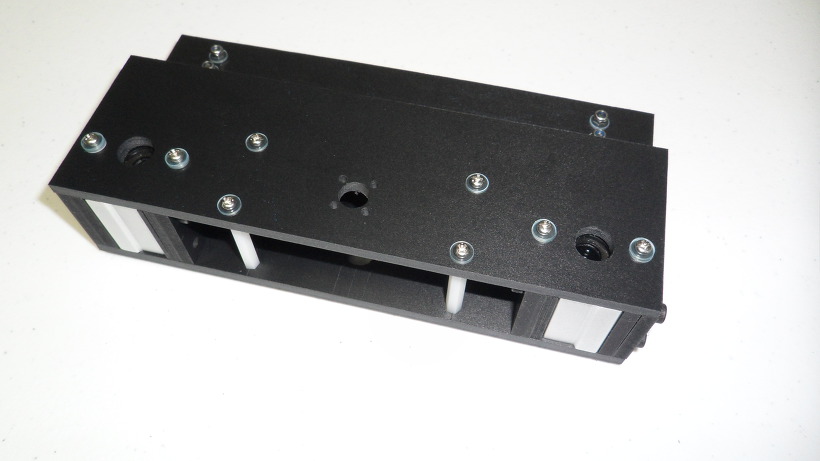
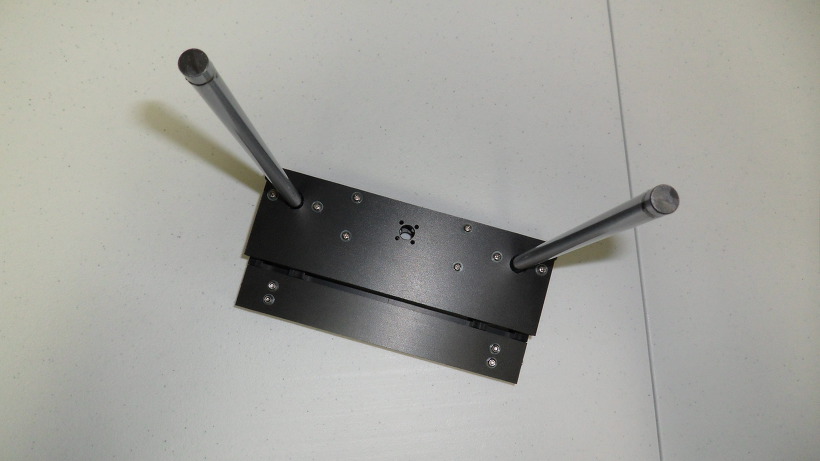
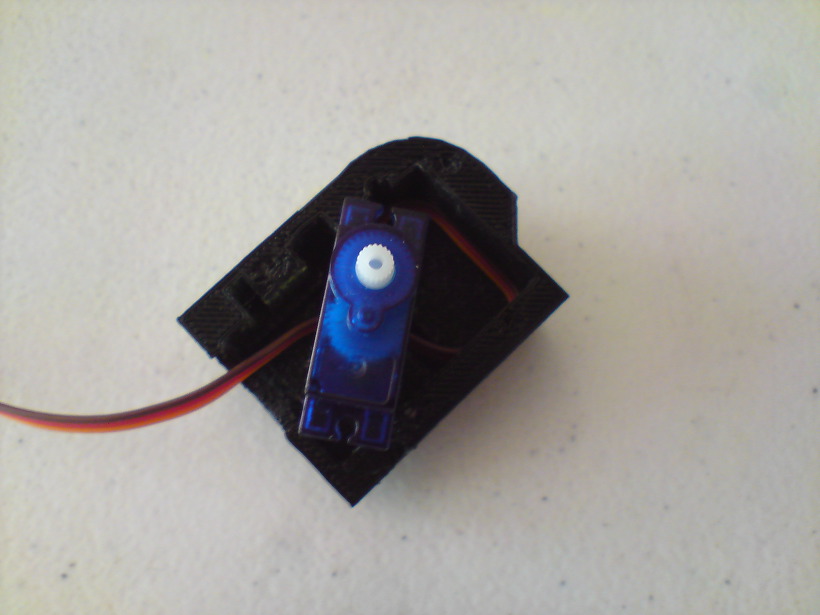
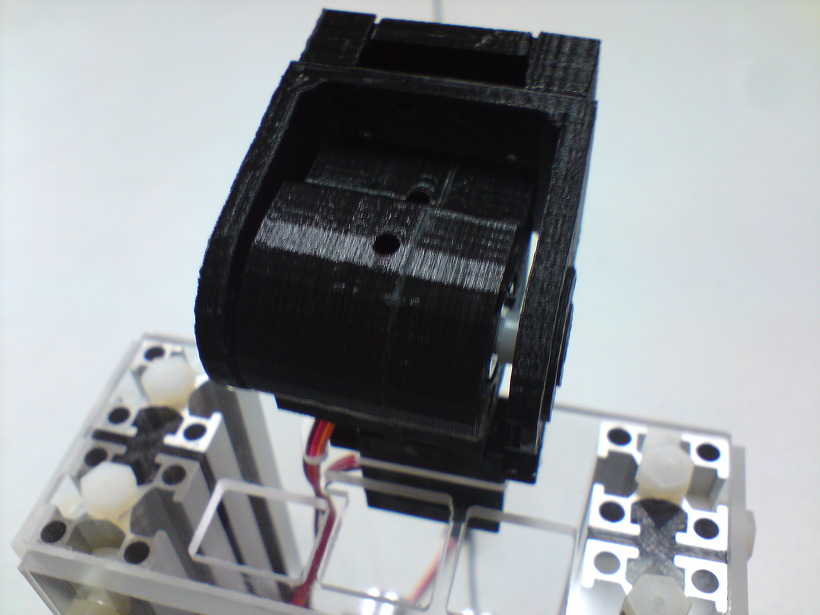
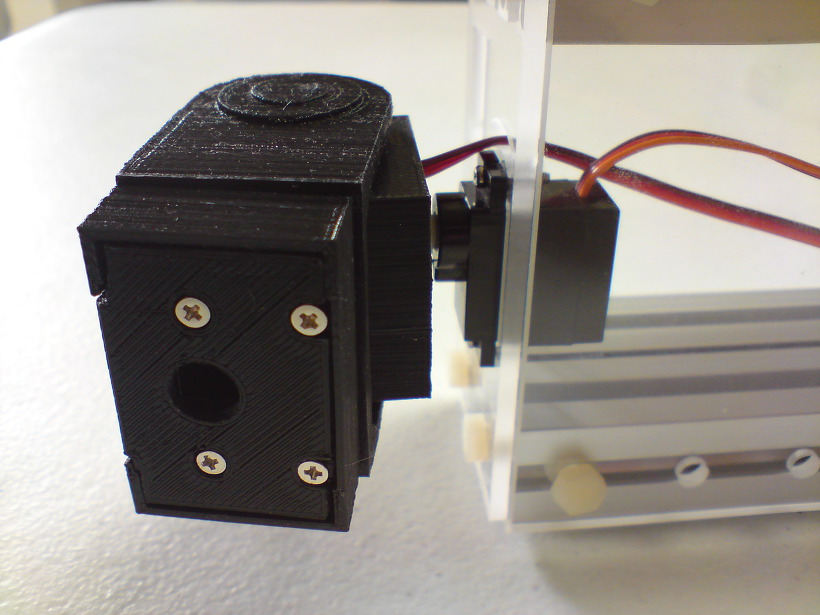
New Version Super Ultra Compact Pan/Tilt Camera Mount
https://www.thingiverse.com/thing:1799905
Old Versions: V1
https://www.thingiverse.com/thing:1242570
https://www.thingiverse.com/thing:350229
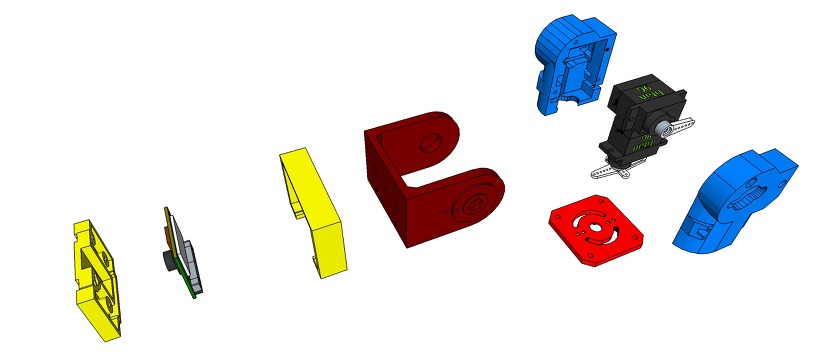
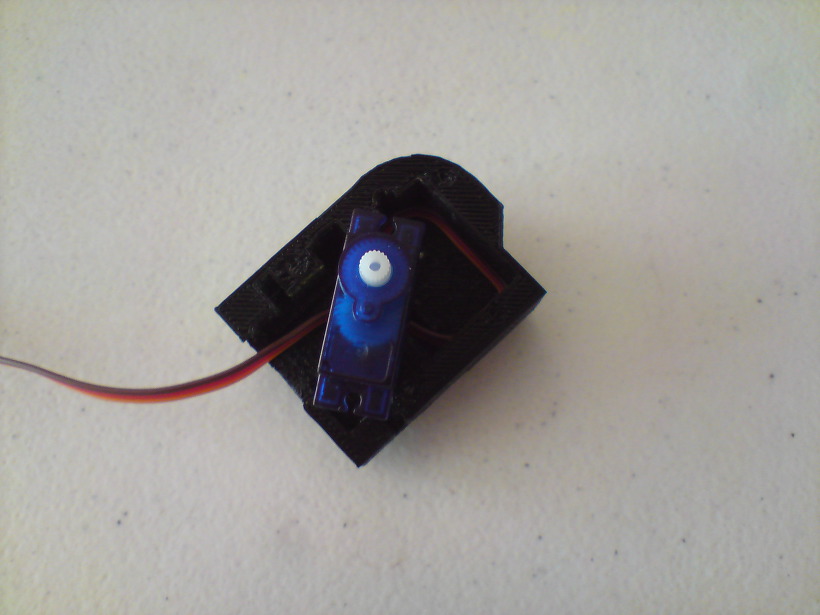
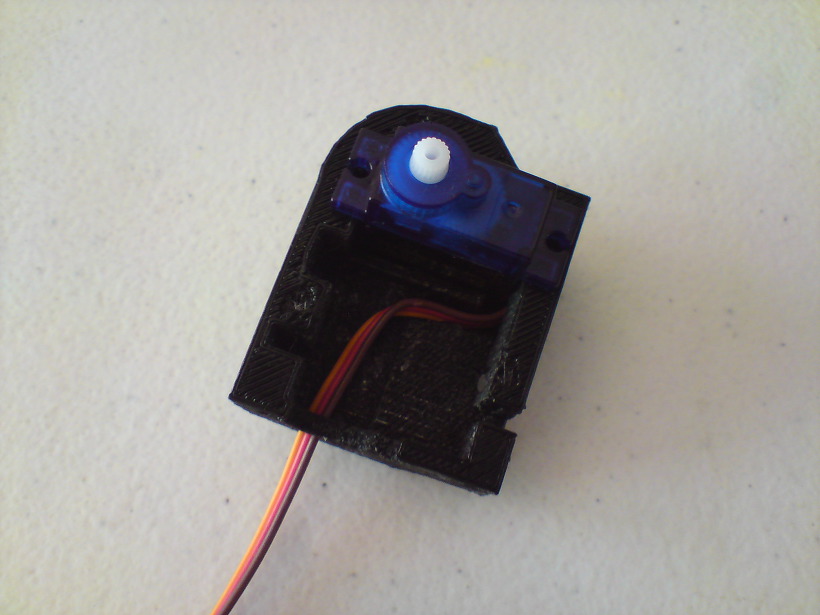
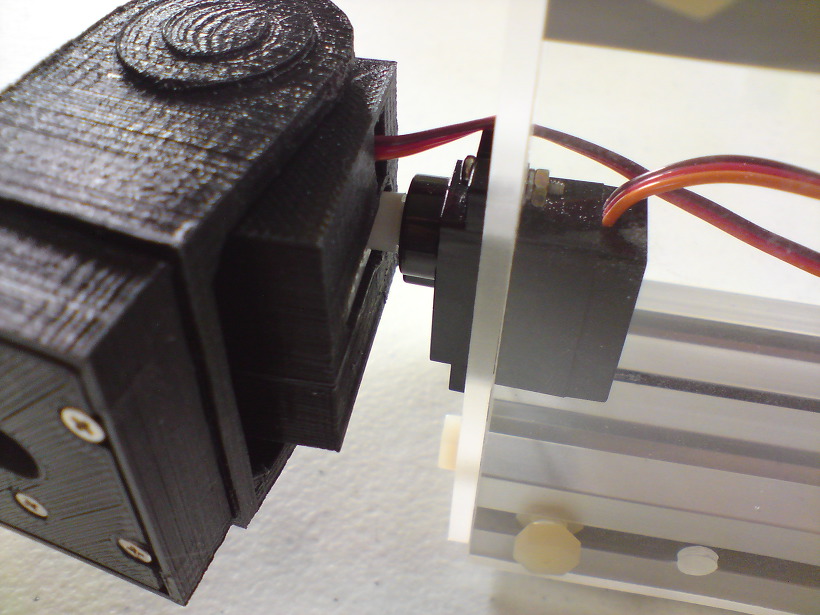
This pan-tilt kit is the perfect way to give your project full range motion with two micro servos.
The pan-tilt can rotate roughly 180° from side-to-side and can tilt up&downwards around 180°.
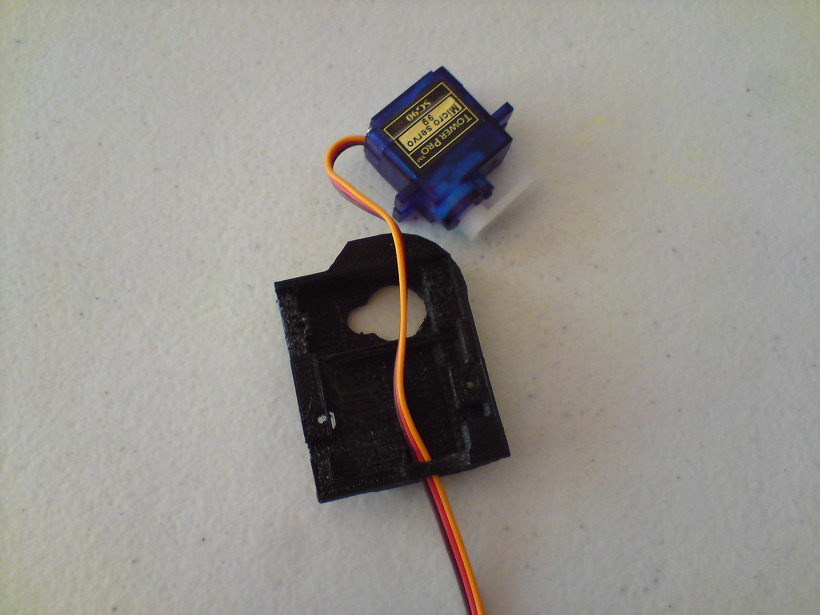
Using two Micro Servos. (Turnigy TG9G, Tower Pro SG90 or SG-92 type)
2 x 9G Servos
4 x 2mm 5mm Tapping screws [For Servo mount]
2 x 2mm 7mm Tapping screws [For Servo hone mount]
2 x M2 6mm [For pan tilt shaft mount]
4 x M2 10mm [For camera mount]
7 x M2 12mm [For base case mount]
3 x M2 Nuts [For base case mount]
4 x M3 15mm [For vert mount]
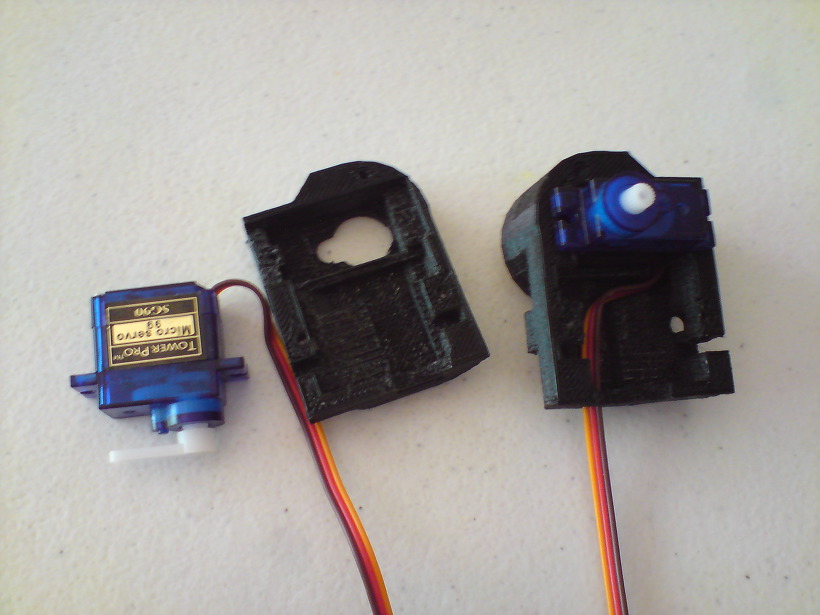
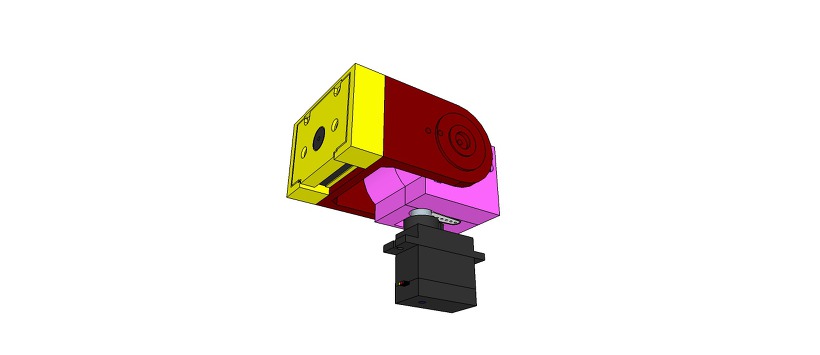
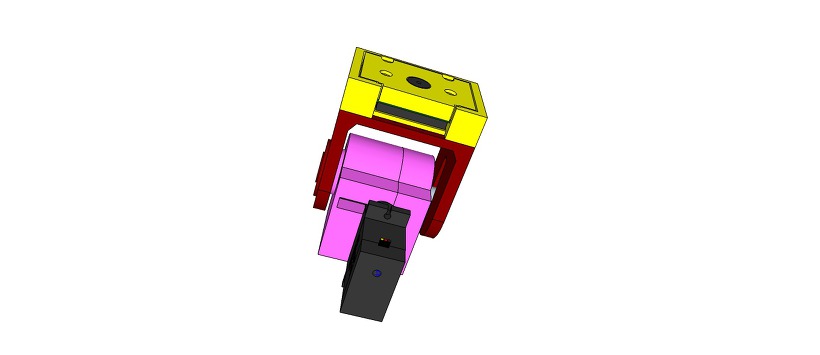
Two type:
Stand alone and PAN servo landfill type
I look forward to seeing your build !!
Enjoy!
The open source SUCPT Cam hardware is free and made with love. Please show your level of support with a voluntary donation.
Donate:
https://www.paypal.com/cgi-bin/webscr?cmd=_s-xclick&hosted_button_id=RDN7ZGAVFS5UE
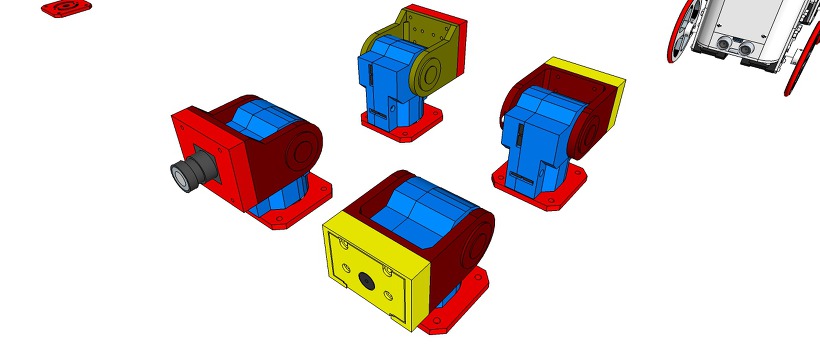
——– Type A ——–
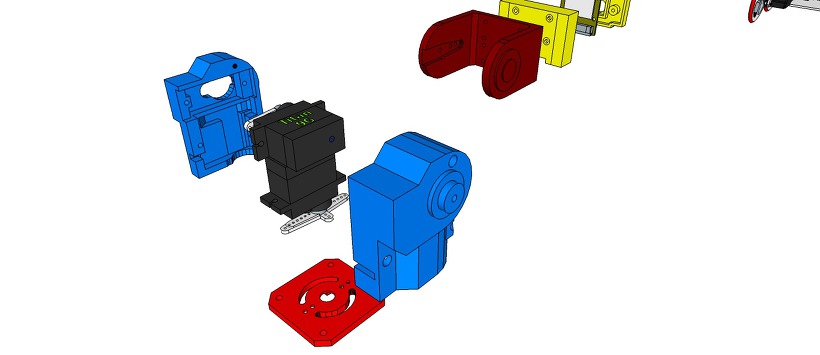


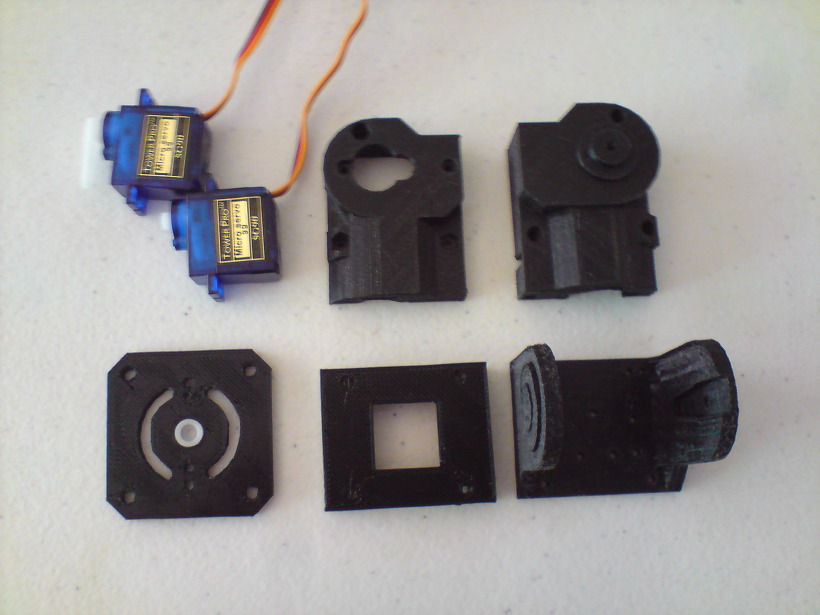

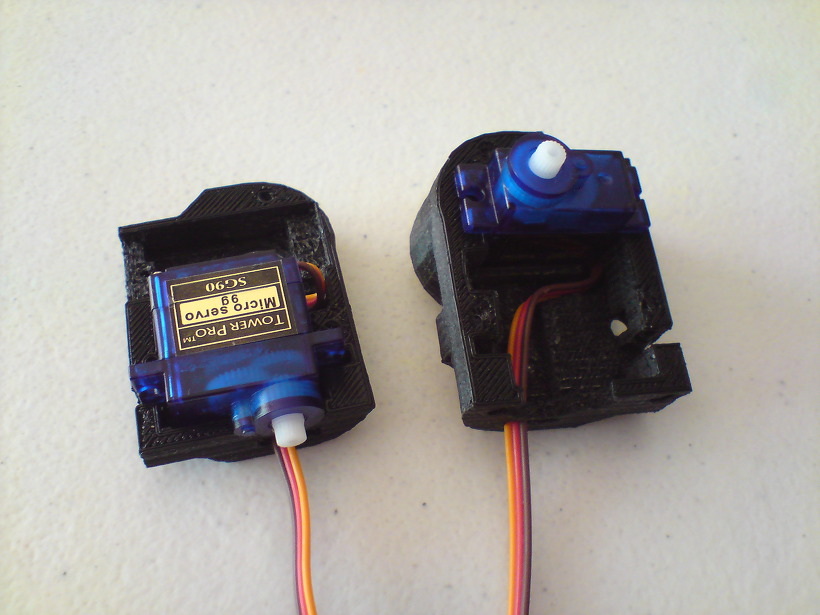
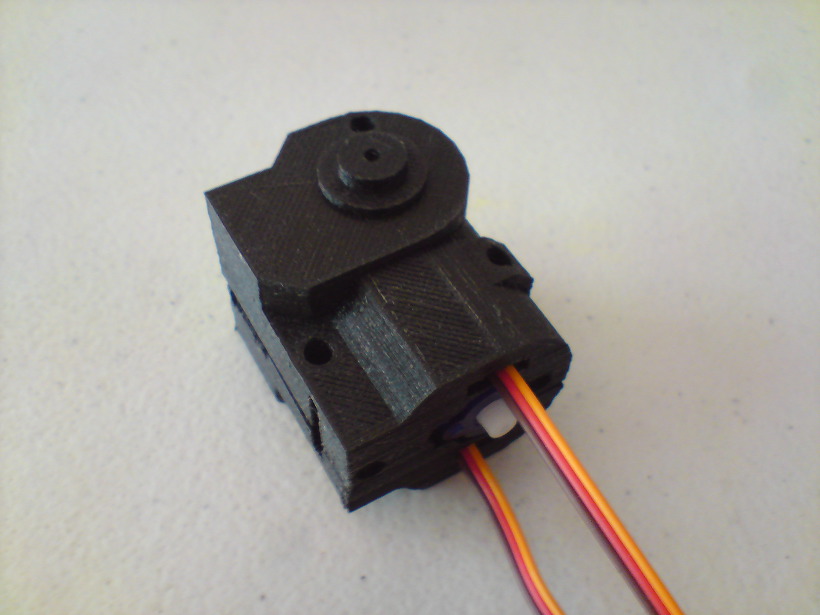
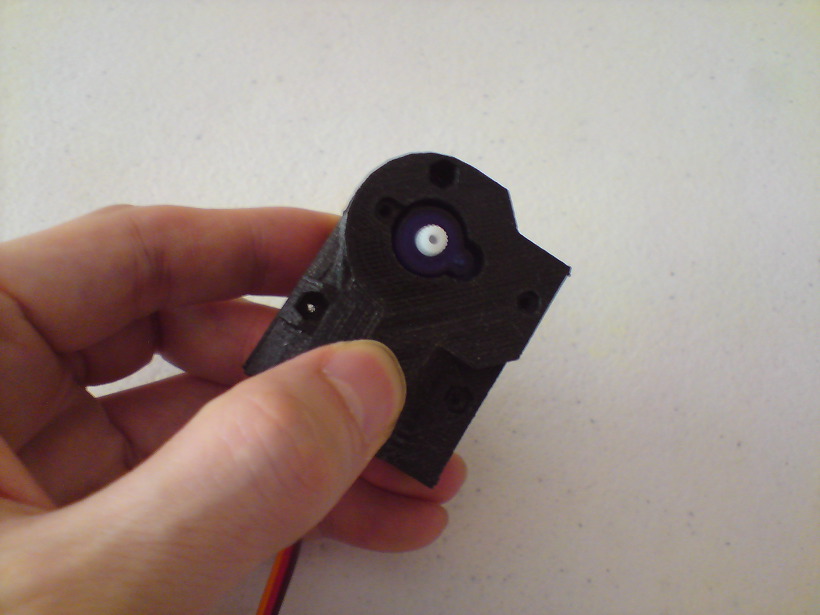
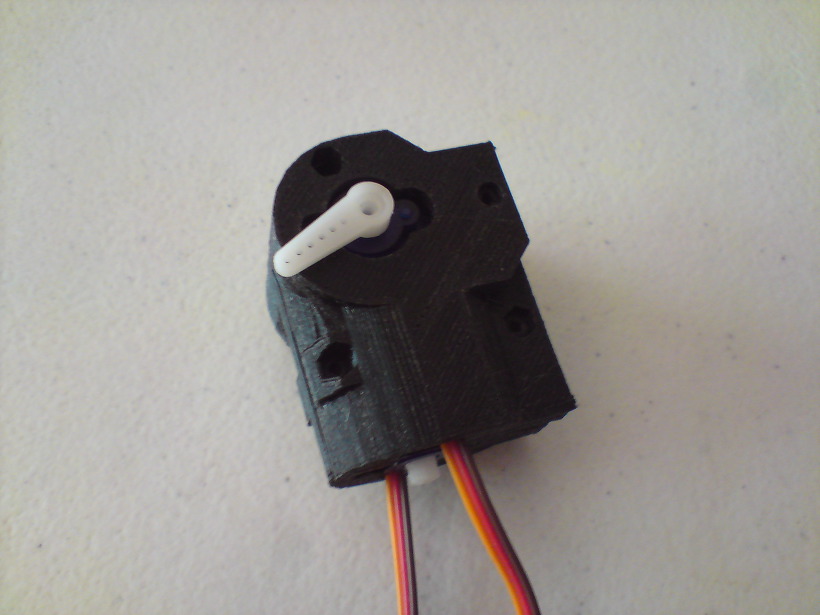
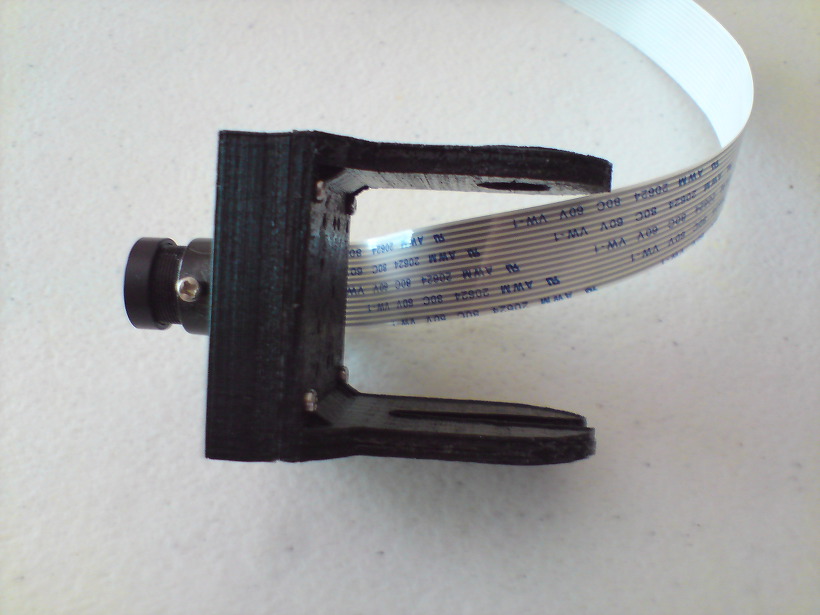
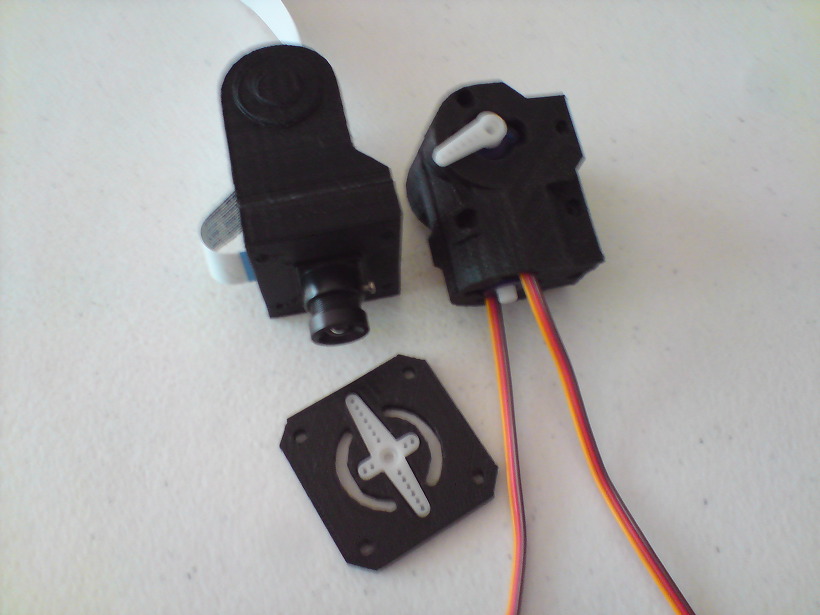
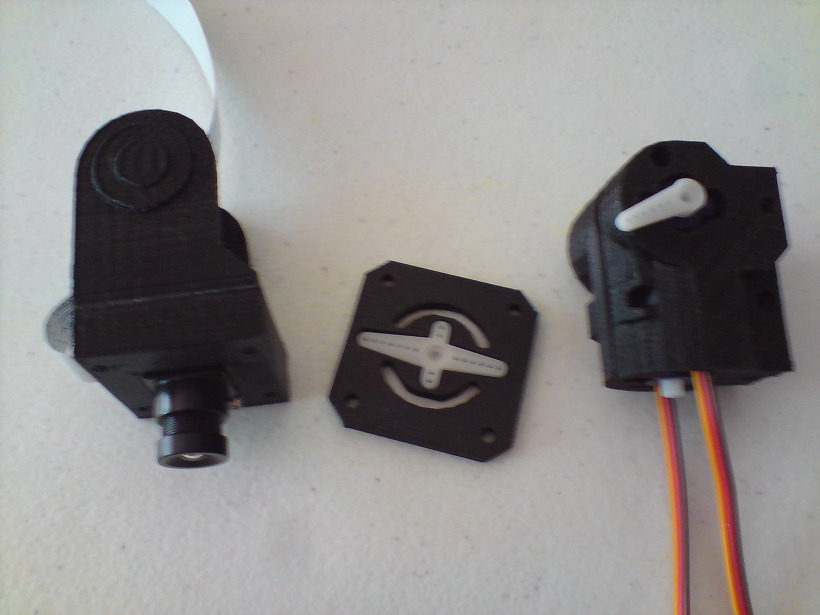
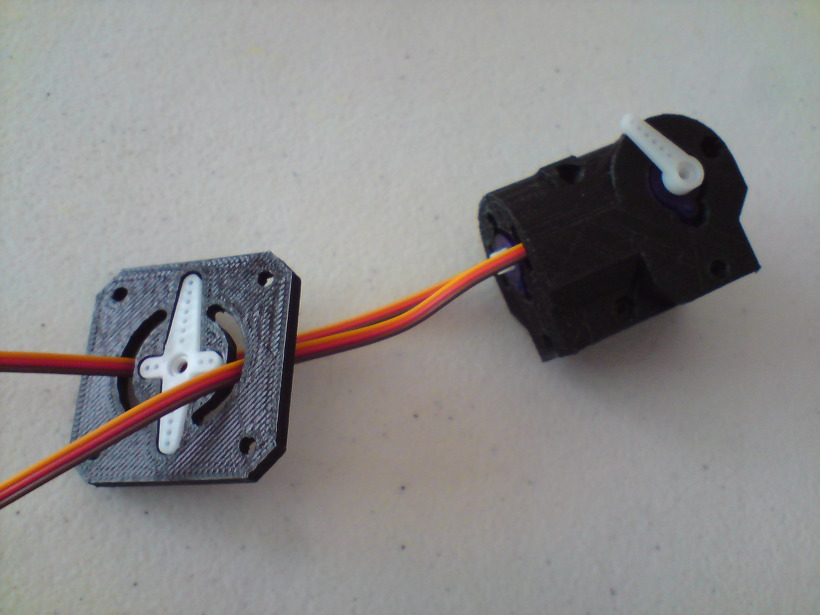

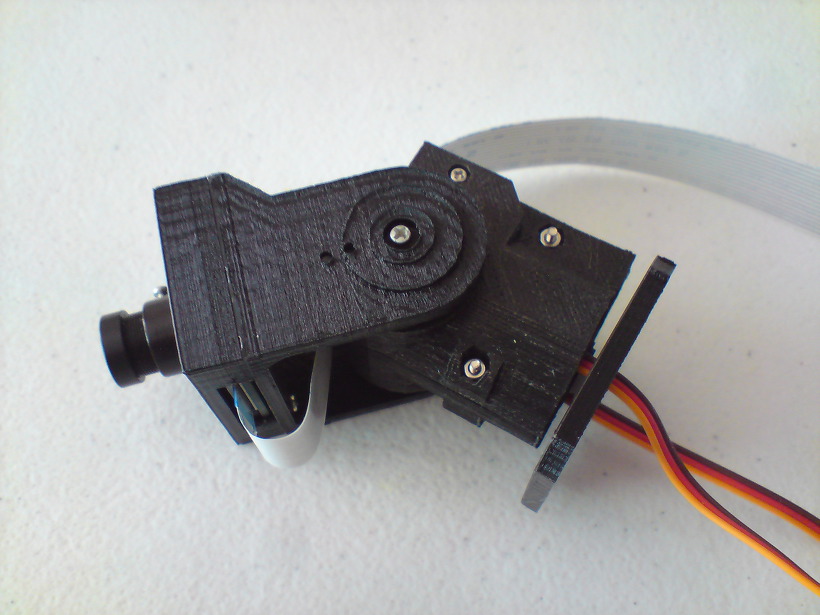
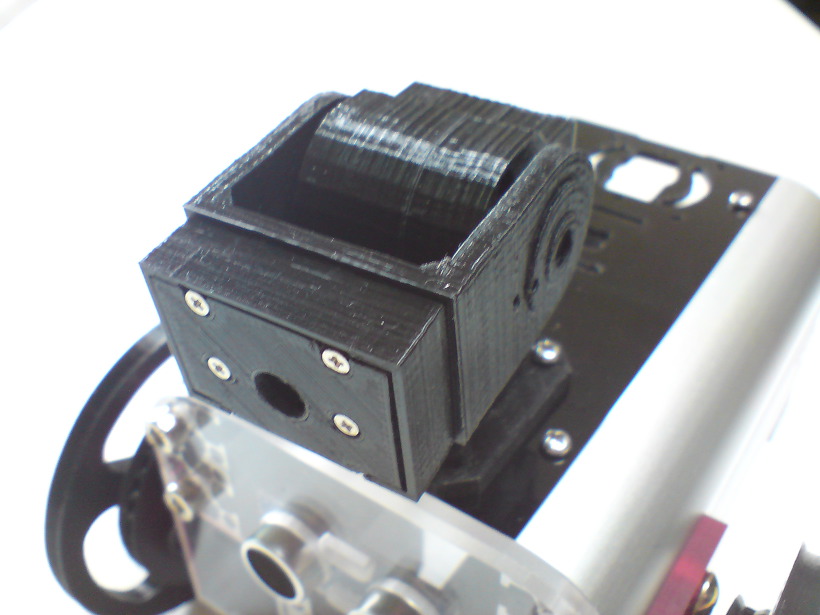
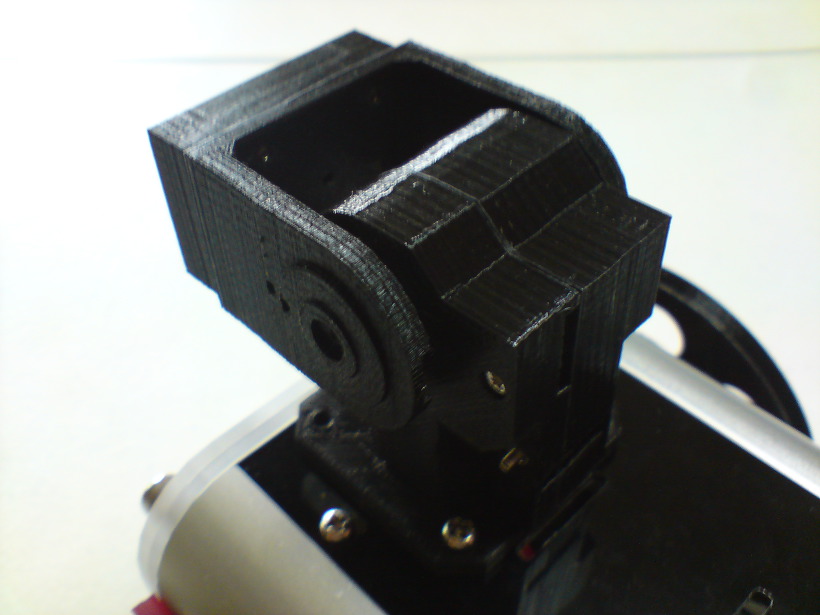
——– Type B ——–

ProfileBlock™ – DIY Robot Platform – Design Concepts
[ Upload design concept 20170418]
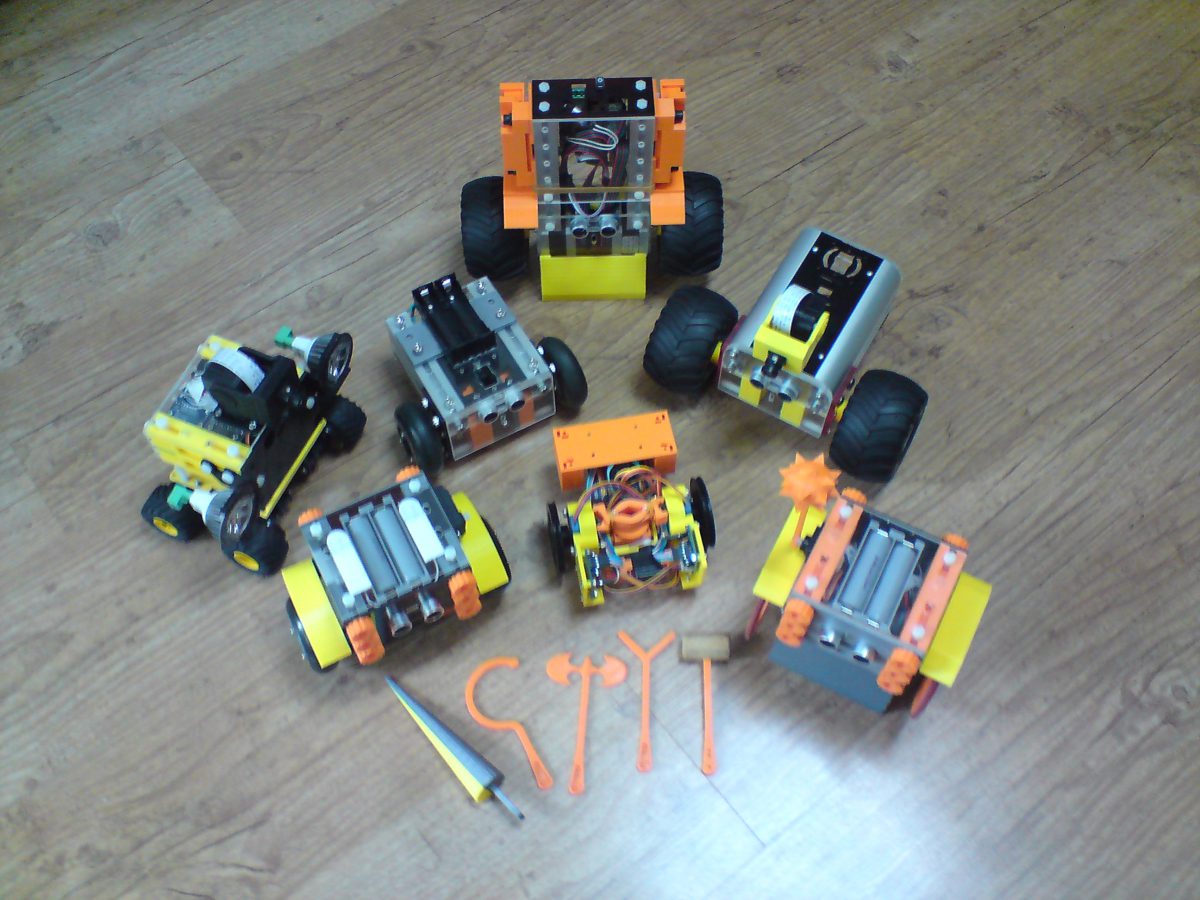
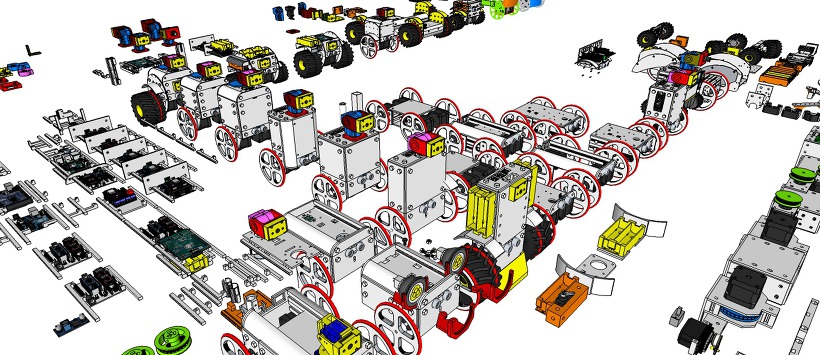
ProfileBlock – DIY Robots & Rover & RC & Etc. Platform
3D Design Tool: SketchUp Pro
ProfileBlock’s robots are built on top of an open source Arduino-based(with ESP8266, Raspberry Pi) platform.
-
- drawBot: Drawing Robot (Polargraph, Pen, …
- Rover
Self Balancing Robot (eX-Robot, B-Robot, Roverbot, …
- RC Car
- Drone
- Scara Arm
- Arm Robot
- XY Plot
- 3D Printer
- HomeIoT
- Etc…
Hardware
Base Plate(Parts):
- Profile DF 2020
- Profile DRF 2020
- Acrylic Plate
- 3D Printing Parts
Step Motor:
- NEMA 17 – Phase: 4, Step Angle: 1.8 Deg/Step, Holding Torque: 2.6Kg.cm
- 28BYJ-48
Servo:
- Standard Servo
- SG90 Servo
Electrical
Control Board:
- Arduino
- ESP8266
- Raspberry Pi
Power Requirements:
- 4.2DVC
- 8.4VDC
- 12 VDC
Battery:
- 18650 x 2ea
- 16340 x 2ea
The open source ProfileBlock hardware and software is free and made with love. Please show your level of support with a voluntary donation.
Donate:
https://www.paypal.com/cgi-bin/webscr?cmd=_s-xclick&hosted_button_id=RDN7ZGAVFS5UE
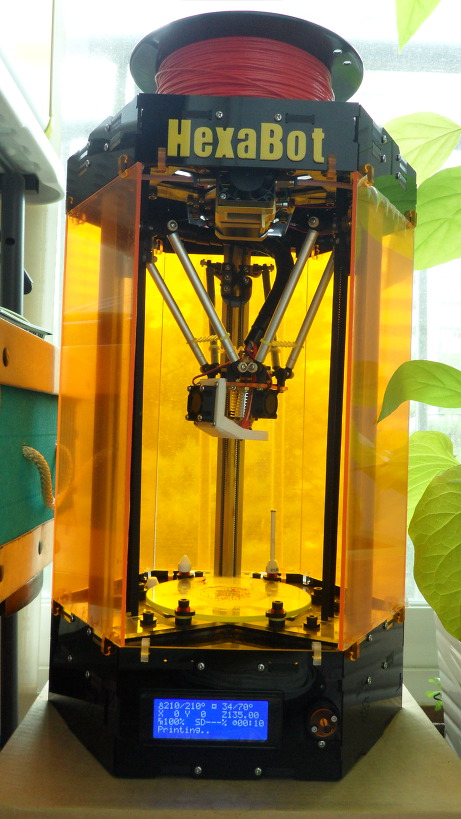
DIY Delta 3D Printer – HexaBot
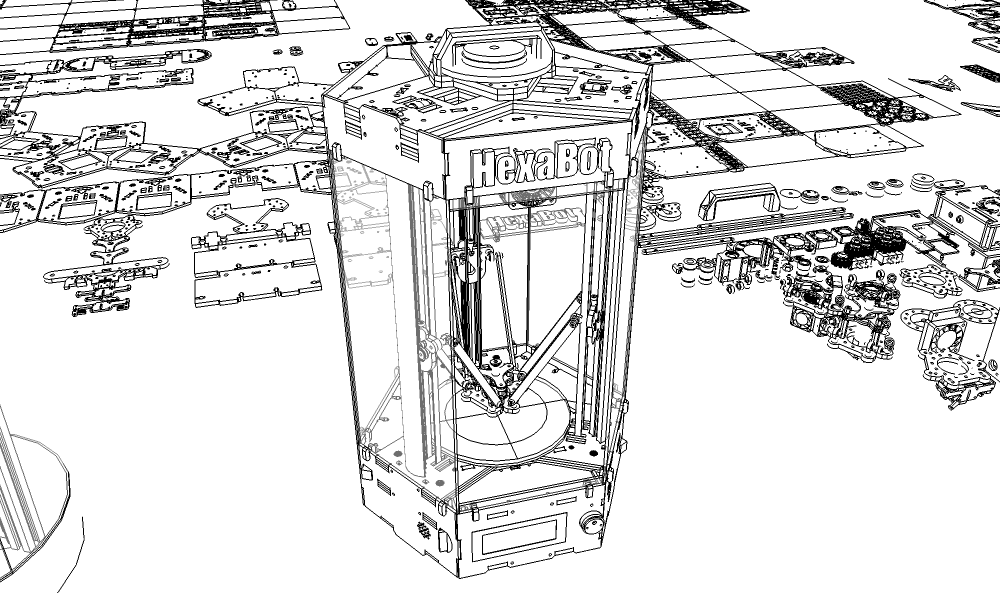
DIY Delta 3D Printer – HexaBot
3D Design Tool: SketchUp Pro
Technical Specifications
Printing
Technology: FFF(Fused Filament Fabrication) / Delta
Build Volume: 95 (W) x 95 (D) x 135 (H) mm
- Auto running Heatbed
Layer Resolution: 50-200 microns
Filament: ABS or PLA, Nyron, HIPS, PVA… 1.75 mm diameter
Nozzle Diameter: 0.4 mm (0.2mm, 0.3mm, 0.8mm)
Print File Type: .Gcode, .STL
Layer Resolutions: - Fast: 200 micron (0.2 mm)
- Normal: 100 micron (0.1 mm)
- hHigh: 0.06 micron (0.06 mm)
- Ultra High: 0,04 micron (0.04 mm)
Size and Weight
Product Dimensions: 260 (W) x 300 (D) x 460 (H) mm
Product Weight: 4.5 kg
Software
Software Bundle: Cura, Slic3r, KISSlicer / Octoprint, Printrun, Repetier-Host, MatterControl
Supported File Types: .STL, .OBJ, .AMF, .Gcode
Operating Systems: All (Web-based): Windows, Mac OS, Linux
Firmware
Arduino: Modified Marlin v1.0.0
Raspberry Pi: Rasbian, Octoprint, SSH, Samba, VNC, WiringPi
Hardware
Base Plate: Profile DRF 2020, Acrylic
Step Motor: NEMA 17 – Phase: 4, Step Angle: 1.8 Deg/Step, Holding Torque: 2.6Kg.cm
- X/Y/Z/E – 4EA
Cartesian (xyz): X/Y Head: LM Guide, Z Bed: 10mm Linear Shaft and 8D Screw Rod
Electrical
Control Board: Arduino Mega 2560
Control Shield: Ramps 1.4 Board
Display Board: Reprap Discount Smart Controller LCD 2004
Raspberry Pi: Raspberry Pi B
Power Requirements: AC 100 – 240 V, 50-60 Hz, 12 VDC, 4.5A, 54 W
Connectivity: USB, SD Card, Wi-Fi (Web-based)
Temperature: - Nozzle temperature: 170 – 270
- Heated bed temperature: 50 – 100
- Operational temperature: 10 – 40
- Storage temperature: 0 – 32
https://www.thingiverse.com/thing:917729
Thanks for watching!…….coming soon!……Updating……
The open source HexaBot hardware and software is free and made with love. Please show your level of support with a voluntary donation.
Donate:
https://www.paypal.com/cgi-bin/webscr?cmd=_s-xclick&hosted_button_id=RDN7ZGAVFS5UE


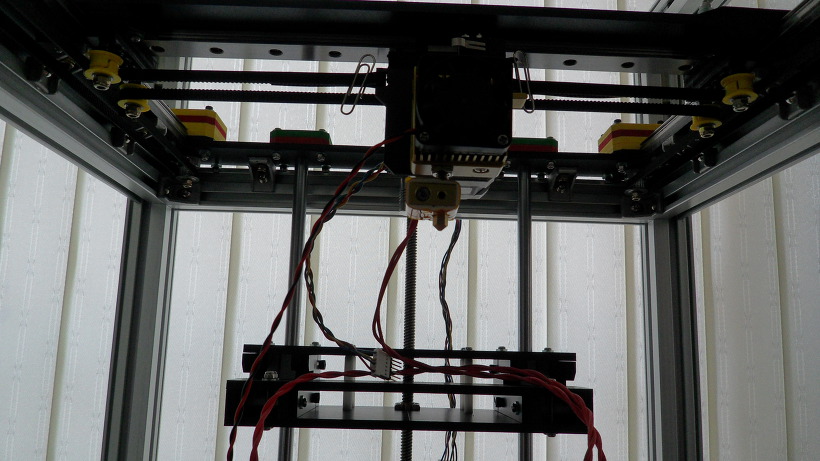
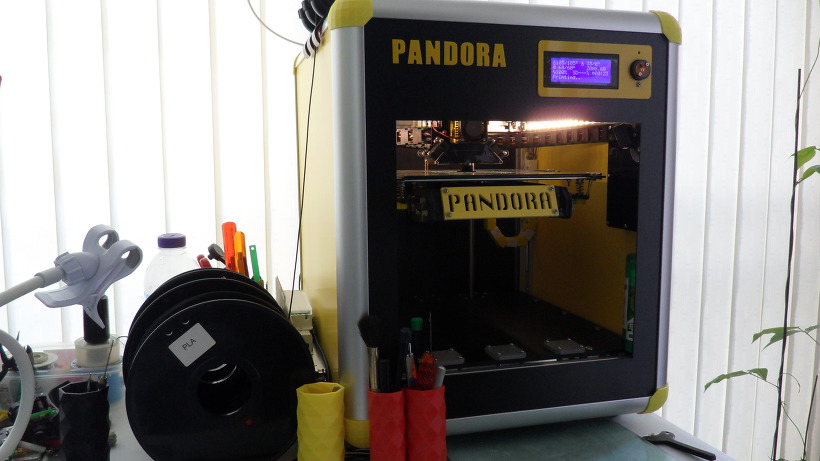
DIY 3D Printer PANDORA DXs
DIY 3D Printer – PANDORA DXs (Design eXtreme single)
3D Design Tool: SketchUp Pro
Technical Specifications
Printing
Technology: FFF(Fused Filament Fabrication) / H-Bot(CoreXY)
Build Volume: 223 (W) x 225 (D) x 165 (H) mm
- Heatbed
Layer Resolution: 50-200 microns
Filament: ABS or PLA, Nyron, HIPS, PVA… 1.75 mm diameter
Nozzle Diameter: 0.4 mm (0.2mm, 0.3mm, 0.8mm)
Print File Type: .Gcode, .STL
Layer Resolutions: - Fast: 200 micron (0.2 mm)
- Normal: 100 micron (0.1 mm)
- hHigh: 0.06 micron (0.06 mm)
- Ultra High: 0,04 micron (0.04 mm)
Size and Weight
Product Dimensions: 426 (W) x 433 (D) x 500 (H) mm
Product Weight: 11 kg
Software
Software Bundle: Cura, Slic3r, KISSlicer / Octoprint, Printrun, Repetier-Host, MatterControl
Supported File Types: .STL, .OBJ, .AMF, .Gcode
Operating Systems: All (Web-based): Windows, Mac OS, Linux
Firmware
Arduino: Modified Marlin v1.0.0
Raspberry Pi: Rasbian, Octoprint, SSH, Samba, VNC, WiringPi
Hardware
Base Plate: Profile DRF 3030, Acrylic
Step Motor: NEMA 17 – Phase: 4, Step Angle: 1.8 Deg/Step, Holding Torque: 2.6Kg.cm - X/Y/Z/E – 4EA
Cartesian (xyz): X/Y Head: LM Guide, Z Bed: 10mm Linear Shaft and 8D Screw Rod
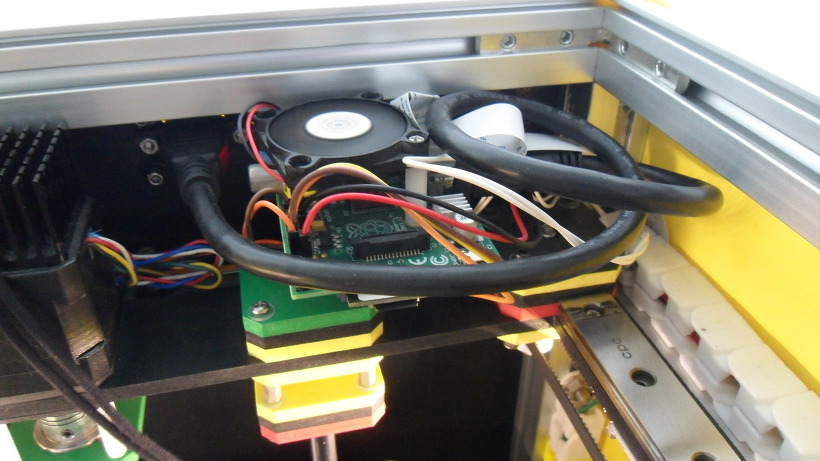
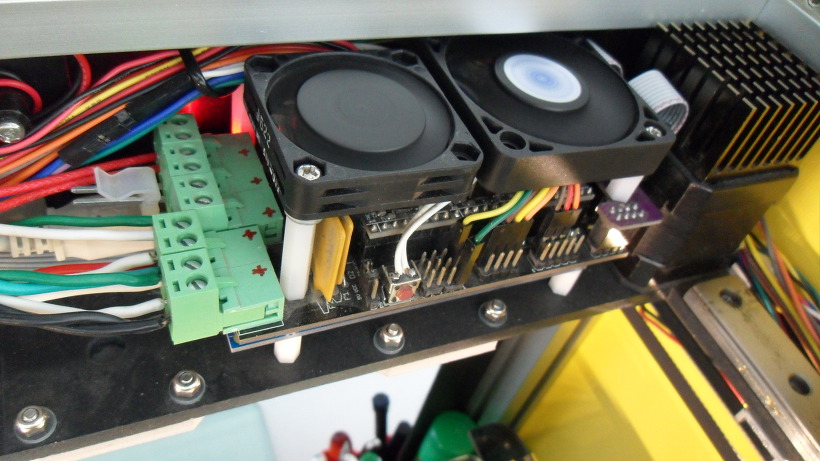
Electrical
Control Board: Arduino Mega 2560
Control Shield: Ramps 1.4 Board
Display Board: Reprap Discount Smart Controller LCD 2004
Raspberry Pi: Raspberry Pi B
Camera: Raspberry Camera
Power Requirements: AC 100 – 240 V, 1.4 Amps, 50-60 Hz, 220 W
Connectivity: USB, SD Card, Wi-Fi (Web-based)
Temperature: - Nozzle temperature: 170 – 270
- Heated bed temperature: 50 – 100
- Operational temperature: 10 – 40
- Storage temperature: 0 – 32
https://www.thingiverse.com/thing:917718
Thanks for watching!……..Coming soon!……..Updating……
The open source PANDORA DXs hardware and software is free and made with love. Please show your level of support with a voluntary donation.
Donate:
https://www.paypal.com/cgi-bin/webscr?cmd=_s-xclick&hosted_button_id=RDN7ZGAVFS5UE