Getting More Program Space on an Arduino Nano

I recently compiled Grbl with the COREXY features enabled. To my surprise, the upload to my Nano failed because it did not have enough program space. I was surprised because the Nano and Arduino UNO use the same ATmega328p microcontroller. A little researched showed that they use different bootloaders.

Normally you a special programmer to program microcontrollers like Arduinos. You plug the programmer into the ICSP (In Circuit Serial Programming) pins on the microcontroller.

Bootloaders eliminate the need for this by putting the programmer right on the microcontroller. When you start (boot) the microcontroller, the bootloader runs first. It looks for someone trying to load a program. If it does not see that it switches to running the last uploaded program in another part of memory. The only penalty to this is that the bootloader needs to use a small amount of memory and it delays the start of your program a little. The total amount of memory available to the users is the flash memory size (32k for the …328P chip) minus the bootloader. The Nano and UNO use different bootloaders. The Nano uses a 2k bootloader and the UNO uses a 0.5k bootloader.

To get more memory of the Nano we have two options. We can use an ICSP programmer to use all of the memory. This removes the bootloader. The other option is to use a programmer to put the smaller UNO bootloader on the Nano.

Changing the Bootloader

You will need a programmer. you can get any of a dozen types of dedicated programmers, but you can also use another Arduino with a special sketch loaded on it.

How to use an UNO to Program a Nano

Use the Arduino IDE to upload the Arduino ISP (In-System Programmer) sketch to the UNO.

You will need 6 jumper wires. It is helpful to have a few colors to make it easy to verify the connections. They should have male pins on the UNO side and typically female sockets on the Nano side.  These ribbon style jumpers are nice because you can peel off what you need and they have a lot of colors.


Arduino Uno (the programmer) Nano I/O (the target) Nano ICSP (the target)
5V 5V 5V
Gnd Gnd Gnd
D13 Reset Reset
D11 D11 MOSI
D12 D12 MISO
D13 D13 SCK

Using I/O pins

Or using the ICSP Header

Install the Bootloader.

Be sure UNO is selected in the boards menu. This will make sure the UNO bootloader is used.

Change the programmer to Arduino ISP in the programmer menu. Remember to return it to current setting, typically AVR ISP, after you are done installing the bootloader.

Now select the Burn Bootloader menu. This will now install the UNO bootloader onto the Nano using the Arduino UNO as a programmer.

Using the Nano.

The Nano should now have the smaller UNO bootloader. When programming from now on, be sure to select UNO in the boards menu. The IDE will no longer be able program it as a Nano. You might want to mark the Nano so you remember this.

Extra Reading…..

How does the USB cable reboot the microcontroller?

In order to program the microcontroller via USB it needs to restart (boot). It does this using a special trick. Arduinos show up as a serial port (COM port).  The Arduino only uses the Tx and Rx signals to transmit data. The USB adapter supports other RS232 signals. The DTR (Data Terminal Ready) signal is used to reset the Arduino. The DTR signal can be controlled by the program uploading the firmware.

Not shown in the schematic is a 1K pull up resistor on the reset pin near the ATmega328p. To reset the microcontroller you pull the reset pin to ground. The uploader program pulls the DTR signal low. The cap passes this change through, causing a reset, but the 1k pull up returns the reset back to the high (run) state. Remember: Capacitors pass changes (AC), but block a steady voltage (DC). 

Why do they use different bootloaders?

I do not know the answer, but it probably due to the fact that they use different USB chips.

28BYJ-48 Stepper Motor

Stepper Motor  is a motor controlled by a series of electromagnetic coils. The center shaft has a series of magnets mounted on it, and the coils surrounding the shaft are alternately given current or not, creating magnetic fields which repulse or attract the magnets on the shaft, causing the motor to rotate.

This design allows for very precious control of the motor,There are two basic types of stepper motors, unipolar steppers and bipolar steppers .

In This instructable , I will talk about an Unipolar Stepper Motor 28-BYJ48 .

The unipolar stepper motor has five or six wires and four coils (actually two coils divided by center connections on each coil). The center connections of the coils are tied together and used as the power connection. They are called unipolar steppers because power always comes in on this one pole.

Step 1: Specification , Motor Driver

There are many Types of Drivers , L293 , ULN2003 , A3967SLB , And More ,
The 28-BYJ48 Even comes with Breakout using ULN2003 As a Motor driver chip .
Specification for this Motor  ” And you can download datasheet from the attachment “Rated voltage : 5VDC
Number of Phase 4
Speed Variation Ratio 1/64
Stride Angle 5.625° /64
Frequency 100Hz
DC resistance 50Ω±7%(25℃)
Idle In-traction Frequency > 600Hz
Idle Out-traction Frequency > 1000Hz
In-traction Torque >34.3mN.m(120Hz)
Self-positioning Torque >34.3mN.m
Friction torque 600-1200 gf.cm
Pull in torque 300 gf.cm
Insulation grade Aand the schematics of  This breakout shown like the Pictures on the attachment
Note that if you want to use L293 Instead of ULN2003 , You will need to leave Red wire No connection.

Materials :

you will need :

1) Arduino Board .
2) BYJ48 Stepper Motor 5v
3) ULN2003 Moror driver Module
4) Jumper .
5) 5v voltage source  “Optional” .

Step 2: Arduino Code .

\

The Arduino IDE Support a Library for Stepper Motor , Very Easy to use , After Connect Motor with arduino You can Upload the Sketch on to the arduino .

But …

You must take something  in consider :

This Motor has a Gear ratio of 64 , and Stride Angle 5.625°  so this motor has a 4096 Steps .

 steps = Number of steps in One Revolution  * Gear ratio   .

steps= (360°/5.625°)*64″Gear ratio” = 64 * 64 =4096 . this value will substitute it on The arduino Sketch

For adafruit Stepper Motor , the Stride Angle 7.5° and Gear ratio is 16 , So number of steps in 1 Revolution is :

steps in One Revolution  = 360 / 7.5 = 48   .

steps= 48 * 16 = 768

That’s will be different depend on what motor you are using , So check The Datasheet for Your stepper Motor to calibrate this values

28-BYJ48 Motor Datasheet .

Motor Driver ULN2003 BreakOut Connected To Arduino From IN1 – IN4 To D8 – D11 Respectively

To Power you Motor ,  Recommanded to use external Power Supply with 5V-500mA  at least , Don’t power it directly from arduino Board 5V .

Step 3: Library Direction Issue … And how to fix it .

When You Upload the sketch to the arduino , The Motor will Be rotate in  one direction By type the command :

step(steps);

So you must Put the Number of step to turn the motor .

The reference  said You can put the positive value to turn one direction, negative to turn the other.

If that’s  OK With Your stepper Motor , You  don’t need to read the following .

If Not , Your Motor turn to same direction even you Put the steps Positive Value or negative , What is the issue ?

This Motor need to operate as the Table on the attachment .

the arduino Stepper Library need to modify to match this requirement .

I wrote a code which is allow to this motor to Move clockwise and counter clock wise

Code in the next step :

Step 4: Modify Code

the final code for this Stepper motor :

/*
BYJ48 Stepper motor code
Connect :
IN1 >> D8
IN2 >> D9
IN3 >> D10
IN4 >> D11
VCC … 5V Prefer to use external 5V Source
Gnd
written By :Mohannad Rawashdeh
http://www.instructables.com/member/Mohannad+Rawashdeh/
28/9/2013
*/

#define IN1  8
#define IN2  9
#define IN3  10
#define IN4  11
int Steps = 0;
boolean Direction = true;// gre
unsigned long last_time;
unsigned long currentMillis ;
int steps_left=4095;
long time;
void setup()
{
Serial.begin(115200);
pinMode(IN1, OUTPUT);
pinMode(IN2, OUTPUT);
pinMode(IN3, OUTPUT);
pinMode(IN4, OUTPUT);
// delay(1000);

}
void loop()
{
while(steps_left>0){
currentMillis = micros();
if(currentMillis-last_time>=1000){
stepper(1);
time=time+micros()-last_time;
last_time=micros();
steps_left–;
}
}
Serial.println(time);
Serial.println(“Wait…!”);
delay(2000);
Direction=!Direction;
steps_left=4095;
}

void stepper(int xw){
for (int x=0;x<xw;x++){
switch(Steps){
case 0:
digitalWrite(IN1, LOW);
digitalWrite(IN2, LOW);
digitalWrite(IN3, LOW);
digitalWrite(IN4, HIGH);
break;
case 1:
digitalWrite(IN1, LOW);
digitalWrite(IN2, LOW);
digitalWrite(IN3, HIGH);
digitalWrite(IN4, HIGH);
break;
case 2:
digitalWrite(IN1, LOW);
digitalWrite(IN2, LOW);
digitalWrite(IN3, HIGH);
digitalWrite(IN4, LOW);
break;
case 3:
digitalWrite(IN1, LOW);
digitalWrite(IN2, HIGH);
digitalWrite(IN3, HIGH);
digitalWrite(IN4, LOW);
break;
case 4:
digitalWrite(IN1, LOW);
digitalWrite(IN2, HIGH);
digitalWrite(IN3, LOW);
digitalWrite(IN4, LOW);
break;
case 5:
digitalWrite(IN1, HIGH);
digitalWrite(IN2, HIGH);
digitalWrite(IN3, LOW);
digitalWrite(IN4, LOW);
break;
case 6:
digitalWrite(IN1, HIGH);
digitalWrite(IN2, LOW);
digitalWrite(IN3, LOW);
digitalWrite(IN4, LOW);
break;
case 7:
digitalWrite(IN1, HIGH);
digitalWrite(IN2, LOW);
digitalWrite(IN3, LOW);
digitalWrite(IN4, HIGH);
break;
default:
digitalWrite(IN1, LOW);
digitalWrite(IN2, LOW);
digitalWrite(IN3, LOW);
digitalWrite(IN4, LOW);
break;
}
SetDirection();
}
}
void SetDirection(){
if(Direction==1){ Steps++;}
if(Direction==0){ Steps–; }
if(Steps>7){Steps=0;}
if(Steps<0){Steps=7; }
}

Wii 리모컨(Wiimote)으로 RC Car 조종하기 – 2WS (Tamiya M-03)

이젠 벽돌이 되어버린 니텐도 Wii를 되살리기 차원에서 Wii 리모컨을 사용하여 RC Car를 조종하는 프로젝트를 시작해봅니다.

Source를 수정하여 Tamiya M-03 샤시에 적용해 보기로 했습니다.

Circuit@Home에서 소개 받았습니다!

RC car controlled by Wii Remote on Arduino http://www.circuitsathome.com/mcu/rc-car-controlled-by-wii-remote-on-arduino

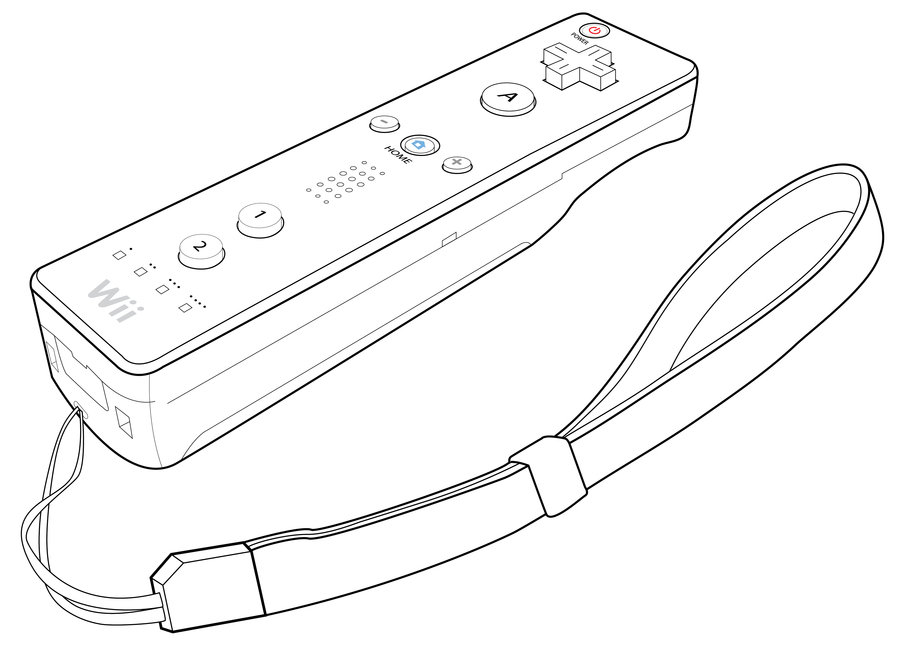
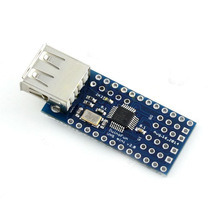
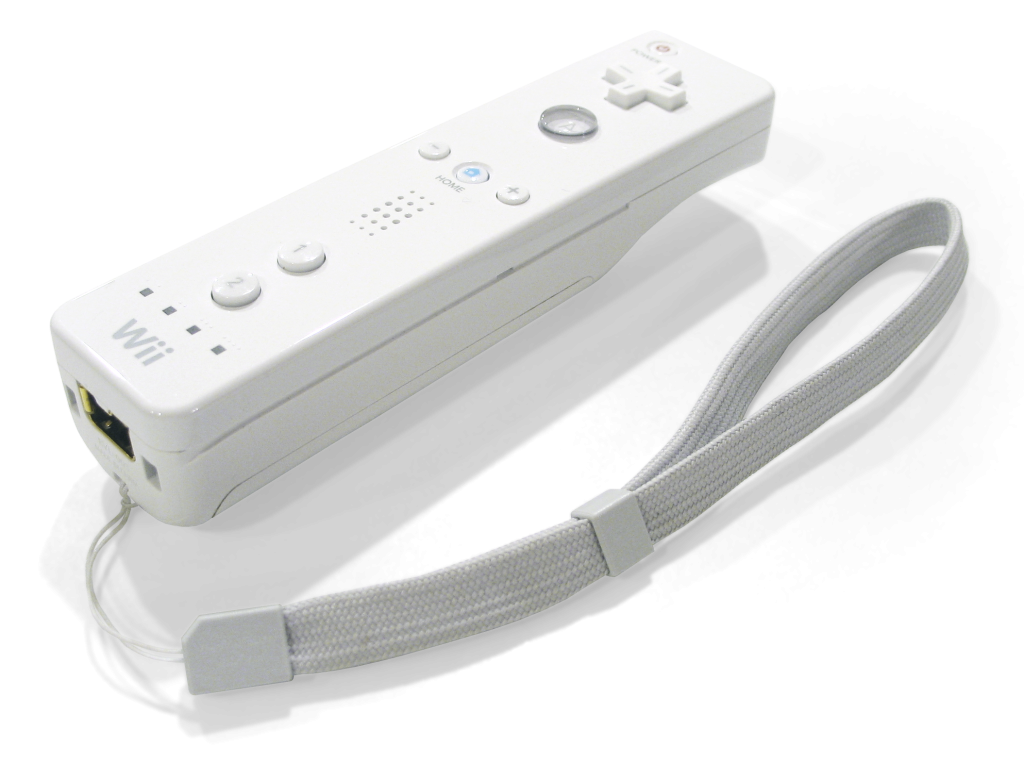
USB Host를 적용하여 Bluetooth로 직접 연결하는 방식이기 때문에 구성은 매우 간단합니다.

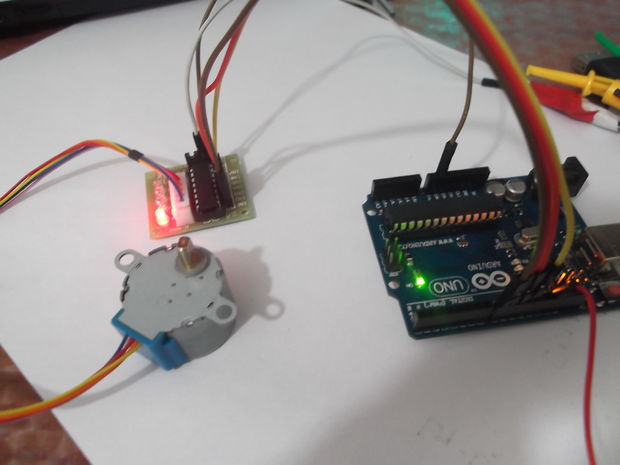
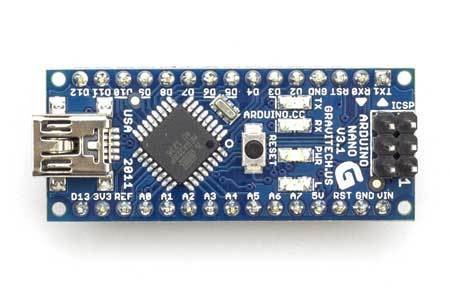
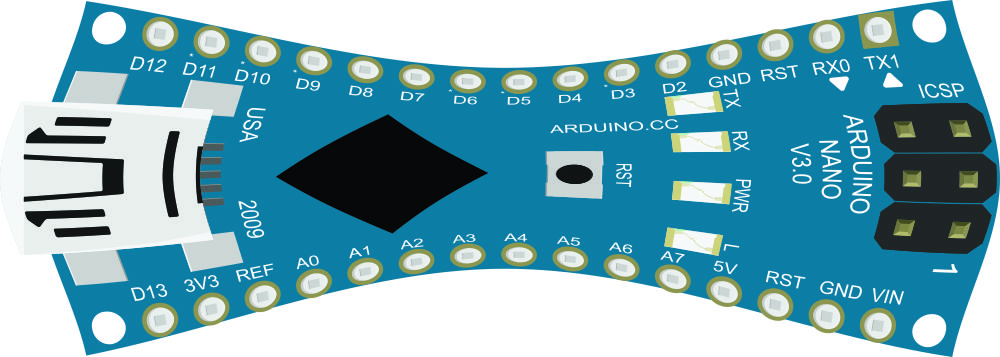
Arduino는 Nano를 사용하였고 USB Host Shield와 연결하기 위해 Mother Board를 하나 꾸며보았습니다.
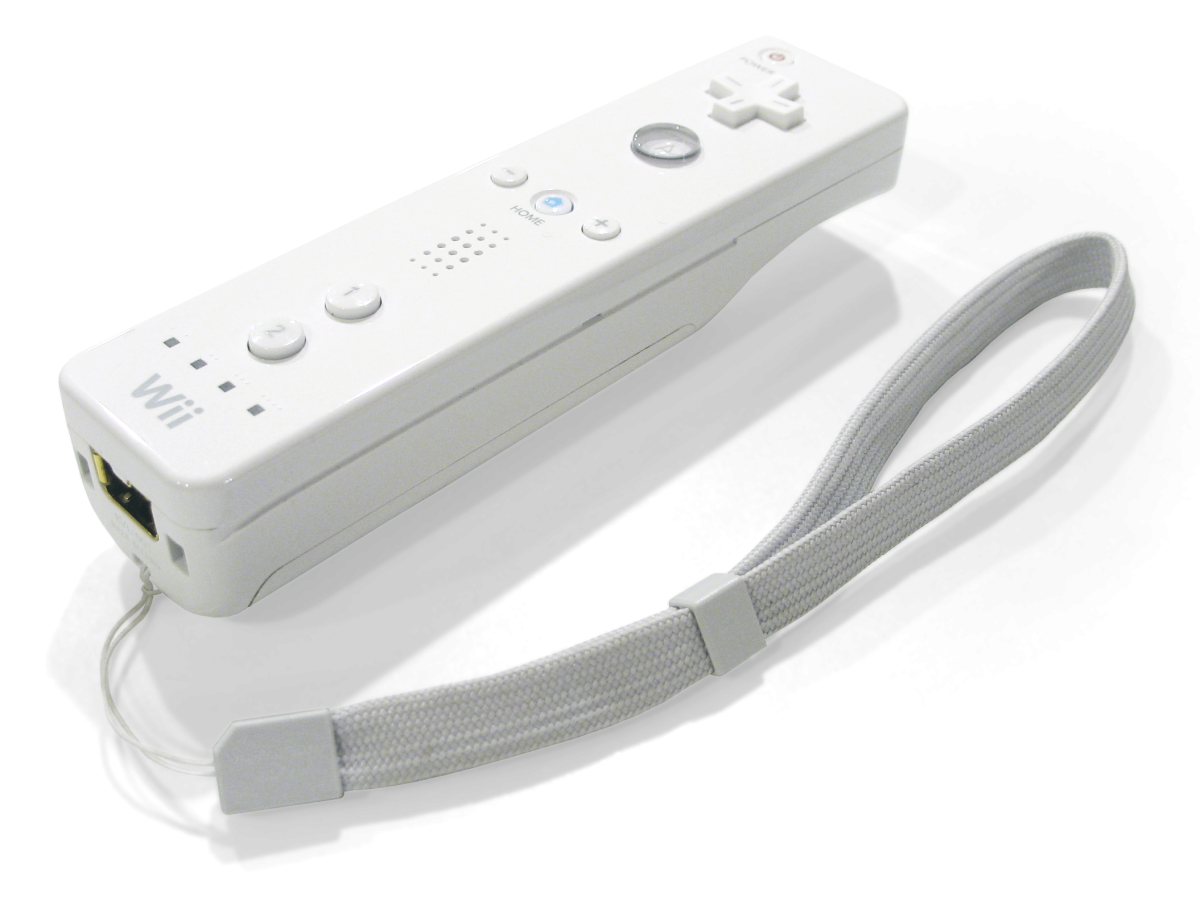
기능도 조금 추가했습니다.

바나나를 던지거나 하지는 못하지만 “A” 버튼을 누르면 레이저가 발사되듯이 Fire LED가 켜지도록 하였고 “+” 버튼은 Head Light, “-” 버튼은 Back Light로 사용할 수 있도록 하였습니다.

그리고 좌우방향 버튼으로도 Steering이 가능하도록 하였습니다.

 Arrow Up  Left steering
 Arrow Down  Right steering
 Arrow Left  Gear Down
 Arrow Right  Gear Up
 A  Fire & Shutting
 B  –
 +  Head Light
 –  Back Light
 1  Backward
 2  Forward
 Home  Throttle mode change

하드웨어 (Hardware)

송신기 (Transmitter)

  • Wii 리모컨 (Wiimote)

수신기 (Reciver)

  • Arduino Nano

  • USB Host Shield
  • Bluetooth USB 어댑터 (Dongle)

  • DIY Mother Board


통신 거리는 Bluetooth 특성상 대략 10m 정도 밖에 안될 거라고 예상합니다만 그 이상도 충분합니다.


RC Car

  • Tamiya M-03

소프트웨어 (Software)

Arduino 용 라이브러리와 스케치를 포함한 파일은 github 에 있습니다.
이 라이브러리는 Richard Ibbotson이 만든 코드 wiiblue.pde 을 기반으로하고 있습니다.

샘플 스케치 (Sketch)

TwoWheelSterringWii.ino

#include “WiiRemote.h”

#include <MemoryFree.h>

#include <Servo.h>

#define PIN_STEERING_SIGNAL        2

#define PIN_ESC_SIGNAL             4

#define PIN_HEAD_LIGHT_SIGNAL     14

#define PIN_BACK_LIGHT_SIGNAL     15

#define PIN_FIRE_SIGNAL           17

#define PIN_STEERING_SELECT       16

#define SERIAL_DEBUG               0    // 0: active mode, 1: serial debug mode

enum eAngle

{

STEERING_ANGLE_MAX           = 165,   // to right

STEERING_ANGLE_CENTER        = 90,

STEERING_ANGLE_MIN           = 15,    // to left

STEERING_ANGLE_STEP          = 5,

STEERING_ANGLE_MAX_INVERT    = 165,   // to right

STEERING_ANGLE_CENTER_INVERT = 90,

STEERING_ANGLE_MIN_INVERT    = 15,    // to left

THROTTLE_ANGLE_MAX           = 160,   // 80,

THROTTLE_ANGLE_CENTER        = 90,

THROTTLE_ANGLE_MIN           = 10,

};

enum eServoPulse

{

SERVO_PULSE_MAX              = 2400,  // to left

SERVO_PULSE_NEUTRAL          = 1550,  // 1500 Futaba compatible, 1.55msec

SERVO_PULSE_MIN              = 600,   // to right

SERVO_PULSE_MAX_INVERT       = 600,   // to right

SERVO_PULSE_NEUTRAL_INVERT   = 1450,  // 1460 Futaba compatible, 1.55msec

SERVO_PULSE_MIN_INVERT       = 2400,  // to left

};

enum eESCPulse

{

/*

*  Futaba timing

*

*  0us     1072us         1522us          1922us

*   +———*————+-*-+————-*

*   |   n/a   |   forwad   |d|d|   Reverse   |

*   +———*————+-*-+————-*

*          Max Forwad     Neutral         Max Reverse

*

*   d: dead zone, +10us and -10us

*/

ESC_PULSE_NEUTRAL     = 1522,

ESC_PULSE_BRAKE       = 1600,

ESC_PULSE_FWD_MAX     = 800,   //1200, // 1072

ESC_PULSE_FWD_MIN     = 1510,

ESC_PULSE_FWD_3RD     = (ESC_PULSE_FWD_MIN – 240),

ESC_PULSE_FWD_2ND     = (ESC_PULSE_FWD_MIN – 160),

ESC_PULSE_FWD_1ST     = (ESC_PULSE_FWD_MIN – 80),

ESC_PULSE_REV_MAX     = 1700,  // 1922

ESC_PULSE_REV_FIX     = 1650,

ESC_PULSE_REV_MIN     = 1600,

};

enum eGear

{

GEAR_1ST = 1,

GEAR_2ND = 2,

GEAR_3RD = 3,

};

WiiRemote wiiremote;

Servo SteeringServo;

Servo ESC;

void setup()

{

#if SERIAL_DEBUG

Serial.begin(115200);

Serial.print(“\r\nfreeMemory() reports: “);

Serial.print(freeMemory(), DEC);

Serial.println(“Serial connect…”);

#endif

SteeringServo.attach(PIN_STEERING_SIGNAL);

SteeringServo.writeMicroseconds(SERVO_PULSE_NEUTRAL);

ESC.attach(PIN_ESC_SIGNAL);

ESC.writeMicroseconds(ESC_PULSE_NEUTRAL);

pinMode(PIN_HEAD_LIGHT_SIGNAL, OUTPUT);

pinMode(PIN_BACK_LIGHT_SIGNAL, OUTPUT);

digitalWrite(PIN_HEAD_LIGHT_SIGNAL, LOW);

digitalWrite(PIN_BACK_LIGHT_SIGNAL, LOW);

pinMode(PIN_FIRE_SIGNAL, OUTPUT);

digitalWrite(PIN_FIRE_SIGNAL, LOW);

pinMode(PIN_STEERING_SELECT, INPUT);

digitalWrite(PIN_STEERING_SELECT, LOW);

wiiremote.init();

/*

unsigned char wiiremote_bdaddr[6] = {0x00, 0x1e, 0x35, 0xda, 0x48, 0xbc};

wiiremote.setBDAddress(wiiremote_bdaddr, 6);

wiiremote.setBDAddressMode(BD_ADDR_FIXED);

*/

#if SERIAL_DEBUG

Serial.println(“Wiimote connecting…”);

Serial.println(“Please press 1 button and 2 button simultaneously”);

#endif

}

void loop()

{

wiiremote.task(&myapp);

}

int steering_angle          = STEERING_ANGLE_CENTER;

int steering_angle_invert   = STEERING_ANGLE_CENTER_INVERT;

int old_steering_angle      = STEERING_ANGLE_CENTER;

bool analog_throttle        = false;  // false = use “One” button as throttle

int throttle_angle          = THROTTLE_ANGLE_CENTER;

int gear                    = GEAR_1ST;

int pulse_steering;

int pulse_esc;

bool fire                   = false;                  // fire

bool head_light             = false;                  // head light

bool back_light             = false;                  // back light

void myapp(void)

{

#if SERIAL_DEBUG

Serial.print(“\r\n”);

#endif

/* Steering */

steering_angle = getSteeringAngle();

steering_angle_invert = getSteeringAngleInvert();

if (digitalRead(PIN_STEERING_SELECT) == HIGH) {

pulse_steering = map(steering_angle,

STEERING_ANGLE_MIN, STEERING_ANGLE_MAX,

SERVO_PULSE_MAX, SERVO_PULSE_MIN);

SteeringServo.writeMicroseconds(pulse_steering);

} else {

pulse_steering = map(steering_angle_invert,

STEERING_ANGLE_MIN_INVERT, STEERING_ANGLE_MAX_INVERT,

SERVO_PULSE_MAX_INVERT, SERVO_PULSE_MIN_INVERT);

SteeringServo.writeMicroseconds(pulse_steering);

}

if (wiiremote.buttonPressed(WIIREMOTE_UP)) {

steering_angle = STEERING_ANGLE_MIN;

steering_angle_invert = STEERING_ANGLE_MIN_INVERT;

if (digitalRead(PIN_STEERING_SELECT) == HIGH) {

pulse_steering = map(steering_angle, STEERING_ANGLE_MIN, STEERING_ANGLE_MAX, SERVO_PULSE_MAX, SERVO_PULSE_MIN);

SteeringServo.writeMicroseconds(pulse_steering);

} else {

pulse_steering = map(steering_angle_invert, STEERING_ANGLE_MIN_INVERT, STEERING_ANGLE_MAX_INVERT, SERVO_PULSE_MAX_INVERT, SERVO_PULSE_MIN_INVERT);

SteeringServo.writeMicroseconds(pulse_steering);

}

} else if (wiiremote.buttonPressed(WIIREMOTE_DOWN)) {

steering_angle = STEERING_ANGLE_MAX;

steering_angle_invert = STEERING_ANGLE_MAX_INVERT;

if (digitalRead(PIN_STEERING_SELECT) == HIGH) {

pulse_steering = map(steering_angle, STEERING_ANGLE_MIN, STEERING_ANGLE_MAX, SERVO_PULSE_MAX, SERVO_PULSE_MIN);

SteeringServo.writeMicroseconds(pulse_steering);

} else {

pulse_steering = map(steering_angle_invert, STEERING_ANGLE_MIN_INVERT, STEERING_ANGLE_MAX_INVERT, SERVO_PULSE_MAX_INVERT, SERVO_PULSE_MIN_INVERT);

SteeringServo.writeMicroseconds(pulse_steering);

}

}

#if SERIAL_DEBUG

Serial.print(“\tServo=”);

Serial.print(pulse_steering);

#endif

/* Brake and Throttle */

if (wiiremote.buttonPressed(WIIREMOTE_ONE)) {

if (pulse_esc < ESC_PULSE_NEUTRAL) {

// moving forward before press “One”

brake();

pulse_esc = ESC_PULSE_NEUTRAL;

} else {

// while stopping or moving backward, keep moving backward

pulse_esc = ESC_PULSE_REV_FIX;

}

} else {

if (analog_throttle) {

throttle_angle = getThrottleAngle();

pulse_esc = map(throttle_angle,

THROTTLE_ANGLE_MIN, THROTTLE_ANGLE_MAX,

ESC_PULSE_FWD_MIN, ESC_PULSE_FWD_MAX);

} else if (wiiremote.buttonPressed(WIIREMOTE_TWO)) {

switch (gear) {

case GEAR_1ST:

pulse_esc = ESC_PULSE_FWD_1ST;

break;

case GEAR_2ND:

pulse_esc = ESC_PULSE_FWD_2ND;

break;

case GEAR_3RD:

pulse_esc = ESC_PULSE_FWD_3RD;

break;

default:

pulse_esc = ESC_PULSE_NEUTRAL;

break;

}

} else {

pulse_esc = ESC_PULSE_NEUTRAL;

}

}

ESC.writeMicroseconds(pulse_esc);

//delay(15);

#if SERIAL_DEBUG

Serial.print(“\tESC=”);

Serial.print(pulse_esc);

#endif

/* Throttle mode */

if (wiiremote.buttonClicked(WIIREMOTE_HOME)) {

analog_throttle = !analog_throttle;

if (analog_throttle) {

wiiremote.setLED(WIIREMOTE_LED4); // analog mode

} else {

wiiremote.setLED(WIIREMOTE_LED1); // fixed mode, 1st gear

gear = GEAR_1ST;

}

}

/* Shift up or down */

if (!analog_throttle) {

if (wiiremote.buttonClicked(WIIREMOTE_RIGHT)) {

shiftUp();

} else if (wiiremote.buttonClicked(WIIREMOTE_LEFT)) {

shiftDown();

}

}

/* Fire */

if (wiiremote.buttonPressed(WIIREMOTE_A)) {

digitalWrite(PIN_FIRE_SIGNAL, HIGH);

} else {

digitalWrite(PIN_FIRE_SIGNAL, LOW);

}

/* Head light LED */

if (wiiremote.buttonClicked(WIIREMOTE_PLUS)) {

head_light = !head_light;

if (head_light) {

digitalWrite(PIN_HEAD_LIGHT_SIGNAL, HIGH);

} else {

digitalWrite(PIN_HEAD_LIGHT_SIGNAL, LOW);

}

}

/* Back light LED */

if (wiiremote.buttonClicked(WIIREMOTE_MINUS)) {

back_light = !back_light;

if (back_light) {

digitalWrite(PIN_BACK_LIGHT_SIGNAL, HIGH);

} else {

digitalWrite(PIN_BACK_LIGHT_SIGNAL, LOW);

}

}

} // myapp

int getSteeringAngle(void)

{

double rad;

int deg;

rad = acos((double) wiiremote.Report.Accel.Y);

deg = (int) (rad * 180.0 / PI);

/* clipping */

if (deg > STEERING_ANGLE_MAX) { deg = STEERING_ANGLE_MAX; }

if (deg < STEERING_ANGLE_MIN) { deg = STEERING_ANGLE_MIN; }

return deg;

}

int getSteeringAngleInvert(void)

{

double rad;

int deg;

rad = acos((double) wiiremote.Report.Accel.Y);

deg = (int) (rad * 180.0 / PI);

/* clipping */

if (deg > STEERING_ANGLE_MAX_INVERT) { deg = STEERING_ANGLE_MAX_INVERT; }

if (deg < STEERING_ANGLE_MIN_INVERT) { deg = STEERING_ANGLE_MIN_INVERT; }

return deg;

}

int getThrottleAngle(void)

{

double rad;

double compensate_z;

int deg;

rad = asin((double) wiiremote.Report.Accel.Y);

compensate_z = (double) wiiremote.Report.Accel.Z / cos(rad);

rad = asin(compensate_z);

deg = (int) (rad * 180.0 / PI);

/* clipping */

if (deg > THROTTLE_ANGLE_MAX) { deg = THROTTLE_ANGLE_MAX; }

if (deg < THROTTLE_ANGLE_MIN) { deg = THROTTLE_ANGLE_MIN; }

return deg;

}

inline void brake(void)

{

ESC.writeMicroseconds(ESC_PULSE_BRAKE);

delay(15);

ESC.writeMicroseconds(ESC_PULSE_NEUTRAL);

delay(15);

}

inline void shiftUp(void)

{

if (gear < GEAR_3RD) {

gear++;

wiiremote.setLED( (WIIREMOTE_LED1 << (gear – GEAR_1ST)) );

}

}

inline void shiftDown(void)

{

if (gear > GEAR_1ST) {

gear–;

wiiremote.setLED( (WIIREMOTE_LED1 << (gear – GEAR_1ST)) );

}

}

Wii 리모컨(Wiimote)으로 RC Car 조종하기

이젠 벽돌이 되어버린 니텐도 Wii를 바라보다 갑자기 아깝다는 생각이 들어 폭풍 검색을 하다가 Wii 리모컨을 활용할 수 있는 괜찮은 소스를 찾은 것 같아 아래와 같이 소개 합니다.

잘~ 응용하면 재밋는 장난감이 되겠네요.

Circuit@Home에서 소개 받았습니다!

RC car controlled by Wii Remote on Arduino http://www.circuitsathome.com/mcu/rc-car-controlled-by-wii-remote-on-arduino

곳곳에서 Wii 리모컨을 사용한 재미있는 프로젝트를 볼 수 있습니다. PC에서 Bluetooth Stack를 이용한 프로젝트는 많은 있지만, PC를 사용하지 않고 마이컴 (AVR, PIC)에서 Bluetooth Stack를 이용한 프로젝트는 적은 것 같습니다. 그래서 (새삼 느낌입니다 만…) 마리오 카트를 조종하는 느낌으로 무선조종을 만들어 보았습니다. #바나나를 던지거나 하지는 않습니다.

하드웨어 (Hardware)

Arduino에서 Bluetooth Stack을 실현하여 무선조종서보와 ESC를 제어합니다.

송신기 (Transmitter)

  • Wii 리모컨 (Wiimote)

수신기 (Reciver)

  • Arduino
  • USB Host Shield
  • Bluetooth USB 어댑터 (Dongle)

통신 거리는 Bluetooth 특성상 대략 10m 정도 밖에 안될 거라고 예상합니다. 통신 거리를 늘리려면 XBee 등을 사용해야 할 것 입니다.

소프트웨어 (Software)

Arduino 용 라이브러리는 github 에 있습니다.
이 라이브러리는 Richard Ibbotson이 만든 코드 wiiblue.pde 을 기반으로하고 있습니다.
또한 이 라이브러리를 사용하기 위해서는, Oleg Mazurov가 개발 한 라이브러리 가 필요합니다.

샘플 스케치 (Sketch)


SterringWii.ino

#include "WiiRemote.h"
#include <MemoryFree.h>
#include <Servo.h>
#define PIN_STEERING_SIGNAL 2
#define PIN_ESC_SIGNAL  3
#define SERIAL_DEBUG 0
enum eAngle {
  STEERING_ANGLE_MAX    = 165,  // to right
  STEERING_ANGLE_MIN    = 15,   // to left
  STEERING_ANGLE_CENTER = 90,
  STEERING_ANGLE_STEP   = 5,
  THROTTLE_ANGLE_MAX    = 80,
  THROTTLE_ANGLE_MIN    = 10,
  THROTTLE_ANGLE_CENTER = 90,
};
enum eServoPulse {
  SERVO_PULSE_NEUTRAL = 1500, // Futaba compatible, 1.55msec
  SERVO_PULSE_MAX     = 1800, // to left
  SERVO_PULSE_MIN     = 1200, // to right
};
enum eESCPulse {
/*
 *  Futaba timing
 *
 *  0us     1072us         1522us          1922us
 *   +---------*------------+-*-+-------------*
 *   |   n/a   |   forwad   |d|d|   Reverse   |
 *   +---------*------------+-*-+-------------*
 *          Max Forwad     Neutral         Max Reverse
 *
 *   d: dead zone, +10us and -10us
 */
  ESC_PULSE_NEUTRAL = 1522,
  ESC_PULSE_BRAKE   = 1600,
  ESC_PULSE_FWD_MAX = 1200, // 1072
  ESC_PULSE_FWD_MIN = 1510,
  ESC_PULSE_FWD_3RD = (ESC_PULSE_FWD_MIN - 200),
  ESC_PULSE_FWD_2ND = (ESC_PULSE_FWD_MIN - 140),
  ESC_PULSE_FWD_1ST = (ESC_PULSE_FWD_MIN - 80),
  ESC_PULSE_REV_FIX = 1650,
  ESC_PULSE_REV_MAX = 1700, // 1922
  ESC_PULSE_REV_MIN = 1600,
};
enum eGear {
  GEAR_1ST = 1,
  GEAR_2ND = 2,
  GEAR_3RD = 3,
};
WiiRemote wiiremote;
Servo SteeringServo;
Servo ESC;
void setup()
{
#if SERIAL_DEBUG
  Serial.begin(9600);
  Serial.print("\r\nfreeMemory() reports: ");
  Serial.print(freeMemory(), DEC);
#endif
  SteeringServo.attach(PIN_STEERING_SIGNAL);
  SteeringServo.writeMicroseconds(SERVO_PULSE_NEUTRAL);
  ESC.attach(PIN_ESC_SIGNAL);
  ESC.writeMicroseconds(ESC_PULSE_NEUTRAL);
  wiiremote.init();
  /*
  unsigned char wiiremote_bdaddr[6] = {0x00, 0x1e, 0x35, 0xda, 0x48, 0xbc};
  wiiremote.setBDAddress(wiiremote_bdaddr, 6);
  wiiremote.setBDAddressMode(BD_ADDR_FIXED);
  */
}
void loop()
{
  wiiremote.task(&myapp);
}
int steering_angle = STEERING_ANGLE_CENTER;
int old_steering_angle = STEERING_ANGLE_CENTER;
bool analog_throttle = false// false = use "One" button as throttle
int throttle_angle = THROTTLE_ANGLE_CENTER;
int gear = GEAR_1ST;
int pulse_steering;
int pulse_esc;
void myapp(void) {
#if SERIAL_DEBUG
  Serial.print("\r\n");
#endif
  /* Steering */
  steering_angle = getSteeringAngle();
  pulse_steering = map(steering_angle,
                       STEERING_ANGLE_MIN, STEERING_ANGLE_MAX,
                       SERVO_PULSE_MAX, SERVO_PULSE_MIN);
  SteeringServo.writeMicroseconds(pulse_steering);
  //delay(15);
  Serial.print("\tServo=");
  Serial.print(pulse_steering);
  /* Brake and Throttle */
  if (wiiremote.buttonPressed(WIIREMOTE_ONE)) {
    if (pulse_esc < ESC_PULSE_NEUTRAL) {
      // moving forward before press "One"
      brake();
      pulse_esc = ESC_PULSE_NEUTRAL;
    } else {
      // while stopping or moving backward, keep moving backward
      pulse_esc = ESC_PULSE_REV_FIX;
    }
  } else {
    if (analog_throttle) {
      throttle_angle = getThrottleAngle();
      pulse_esc = map(throttle_angle,
                      THROTTLE_ANGLE_MIN, THROTTLE_ANGLE_MAX,
                      ESC_PULSE_FWD_MIN, ESC_PULSE_FWD_MAX);
    } else if (wiiremote.buttonPressed(WIIREMOTE_TWO)) {
      switch (gear) {
       case GEAR_1ST:
        pulse_esc = ESC_PULSE_FWD_1ST;
        break;
       case GEAR_2ND:
        pulse_esc = ESC_PULSE_FWD_2ND;
        break;
       case GEAR_3RD:
        pulse_esc = ESC_PULSE_FWD_3RD;
        break;
       default:
        pulse_esc = ESC_PULSE_NEUTRAL;
        break;
      }
    } else {
      pulse_esc = ESC_PULSE_NEUTRAL;
    }
  }
  ESC.writeMicroseconds(pulse_esc);
  //delay(15);
  Serial.print("\tESC=");
  Serial.print(pulse_esc);
  /* Throttle mode */
  if (wiiremote.buttonClicked(WIIREMOTE_A)) {
    analog_throttle = !analog_throttle;
    if (analog_throttle) {
      wiiremote.setLED(WIIREMOTE_LED4); // analog mode
    } else {
      wiiremote.setLED(WIIREMOTE_LED1); // fixed mode, 1st gear
      gear = GEAR_1ST;
    }
  }
  /* Shift up or down */
  if (!analog_throttle) {
    if (wiiremote.buttonClicked(WIIREMOTE_RIGHT)) {
      shiftUp();
    } else if (wiiremote.buttonClicked(WIIREMOTE_LEFT)) {
      shiftDown();
    }
  }
} // myapp
int getSteeringAngle(void) {
  double rad;
  int deg;
  rad = acos((double) wiiremote.Report.Accel.Y);
  deg = (int) (rad * 180.0 / PI);
  /* clipping */
  if (deg > STEERING_ANGLE_MAX) { deg = STEERING_ANGLE_MAX; }
  if (deg < STEERING_ANGLE_MIN) { deg = STEERING_ANGLE_MIN; }
  return deg;
}
int getThrottleAngle(void) {
  double rad;
  double compensate_z;
  int deg;
    rad = asin((double) wiiremote.Report.Accel.Y);
    compensate_z = (double) wiiremote.Report.Accel.Z / cos(rad);
    rad = asin(compensate_z);
    deg = (int) (rad * 180.0 / PI);
  /* clipping */
  if (deg > THROTTLE_ANGLE_MAX) { deg = THROTTLE_ANGLE_MAX; }
  if (deg < THROTTLE_ANGLE_MIN) { deg = THROTTLE_ANGLE_MIN; }
  return deg;
}
inline void brake(void)
{
    ESC.writeMicroseconds(ESC_PULSE_BRAKE);
    delay(15);
    ESC.writeMicroseconds(ESC_PULSE_NEUTRAL);
    delay(15);
}
inline void shiftUp(void)
{
    if (gear < GEAR_3RD) {
        gear++;
        wiiremote.setLED( (WIIREMOTE_LED1 << (gear - GEAR_1ST)) );
    }
}
inline void shiftDown(void)
{
    if (gear > GEAR_1ST) {
        gear--;
        wiiremote.setLED( (WIIREMOTE_LED1 << (gear - GEAR_1ST)) );
    }
}